install.packages("devtools")
devtools::install_github(repo = "stefvanbuuren/mice")This tutorial starts where we left off in tutorial 1. If you didn’t finish that tutorial, you can use this repository as the base for Tutorial 2.
Introduction
git and GitHub are tools that allow you to create a visible portfolio of your work. This tutorial will guide you through the process of creating a new repository on GitHub, forking the repository, creating a new branch, adjusting the compendium, creating a pull request, reviewing the pull request, and merging the pull request.
Finally, we will make the portfolio visible by creating a website rendering and publishing our Quarto document to GitHub Pages.
Git
Git is a free and open source version control system for text files. It can handle extensive change logging for you, no matter the size of the project. Git is fast and efficient, but its effectiveness depends also on the frequency you instruct it to log your project’s changes.
You can see Git as a blank canvas that starts at a certain point in time. Every time you (or others) instruct Git to log any changes that have been made, Git adds the changes that are made to this canvas. We call the changes to the canvas commits. With every commit an extensive log is created that includes at least the following information:
- the changes made
- who made the changes
- metadata
- a small piece of text that describe the changes made
The difference between two commits - or the changes between them - are called diffs.
If you’d like to know much more about Git, this online book is a very good resource. If you’d like to practice with the command line interface use this webpage for a quick course. This book covers pretty much everything you need to marry Git and R.
GitHub
GitHub is the social and user interface to Git that allows you to work in repositories. These repositories can be seen as project folders in which you publish your work, but you can also use them as test sites for development, testing, etcetera. There is a distinction between private repositories (only for you and those you grant access) and public repositories (visible for everyone).
Your public repositories can be viewed and forked by everyone. Forking is when other people create a copy of your repository on their own account. This allows them to work on a repository without affecting the master. You can also do this yourself, but then the process is called branching instead of forking. If you create a copy of a repository that is offline, the process is called cloning.
GitHub’s ability to branch, fork and clone is very useful as it allows other people and yourself to experiment on (the code in) a repository before any definitive changes are merged with the master. If you’re working in a forked repository, you can submit a pull request to the repository collaborators to accept (or reject) any suggested changes.
For now, this may be confusing, but I hope you recognize the benefits GitHub can have on the process of development and bug-fixing. For example, the most up-to-date version of the mice package in R can be directly installed from the mice repository with the following code:
You can see that this process requires package devtools that expands the R functionality with essential development tools. Loading packages in R directly from their respective GitHub repositories, allows you to obtain the latest - often improved and less buggy - iteration of that software even before it is published on CRAN.
Exercise
Divide your group in two teams:
Team A will be the owner of the repository. Team B will fork the repository and act as a contributor to the repository. Follow the instructions together and make sure that you understand the process. If you have any questions, please ask me, or Carlos.
First, we will create a new repository with GitHub desktop.
- Choose File > New Repository
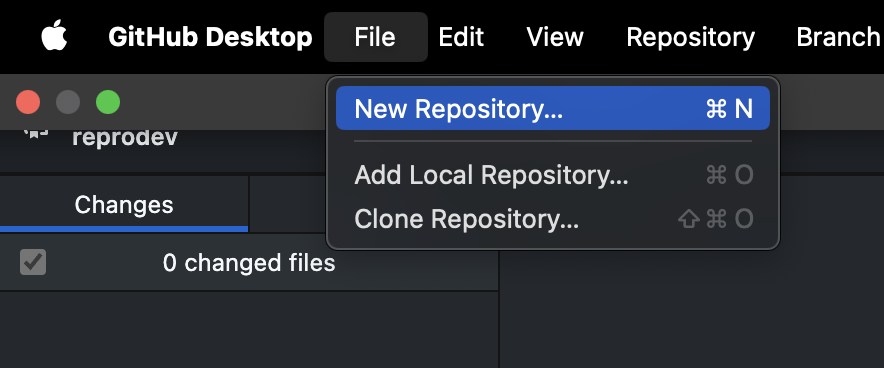
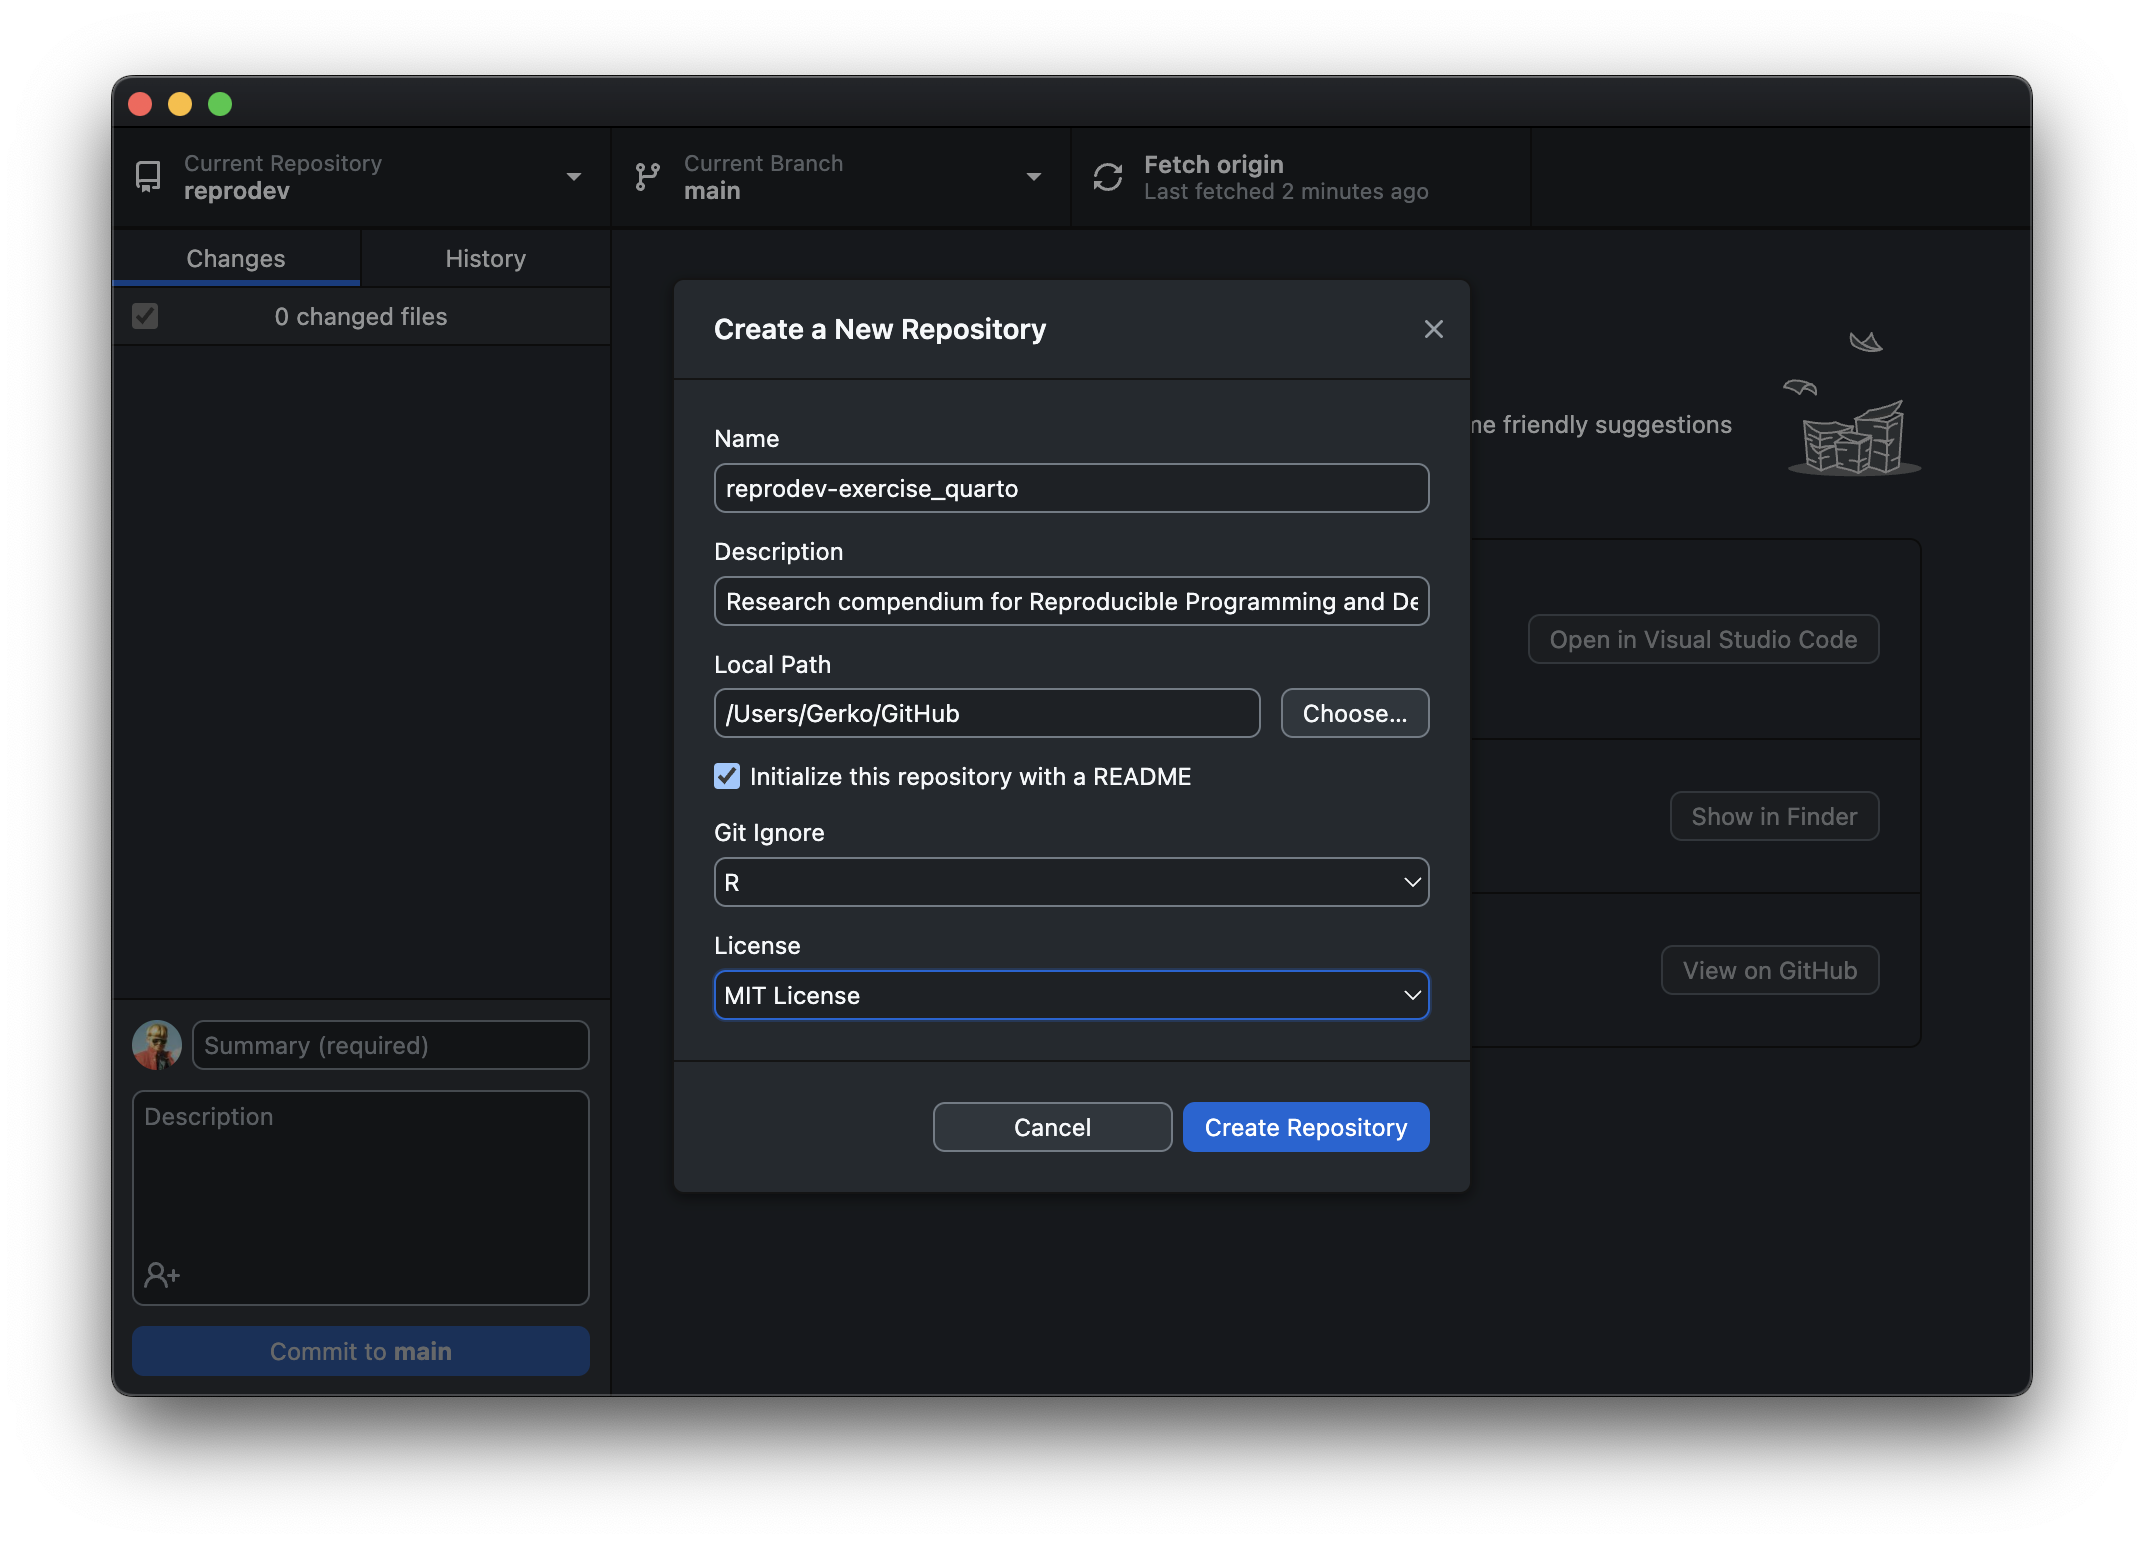
- Choose a name for the repository and a location on your computer and click Create Repository
- Choose initialise this repository with a README
- Choose MIT License
- Choose
Rfor Git Ignore
 3. Now publish the repository to
 GitHub by clicking Publish Repository and follow the instructions.
- Choose a name for the repository
- Untick Keep this code private
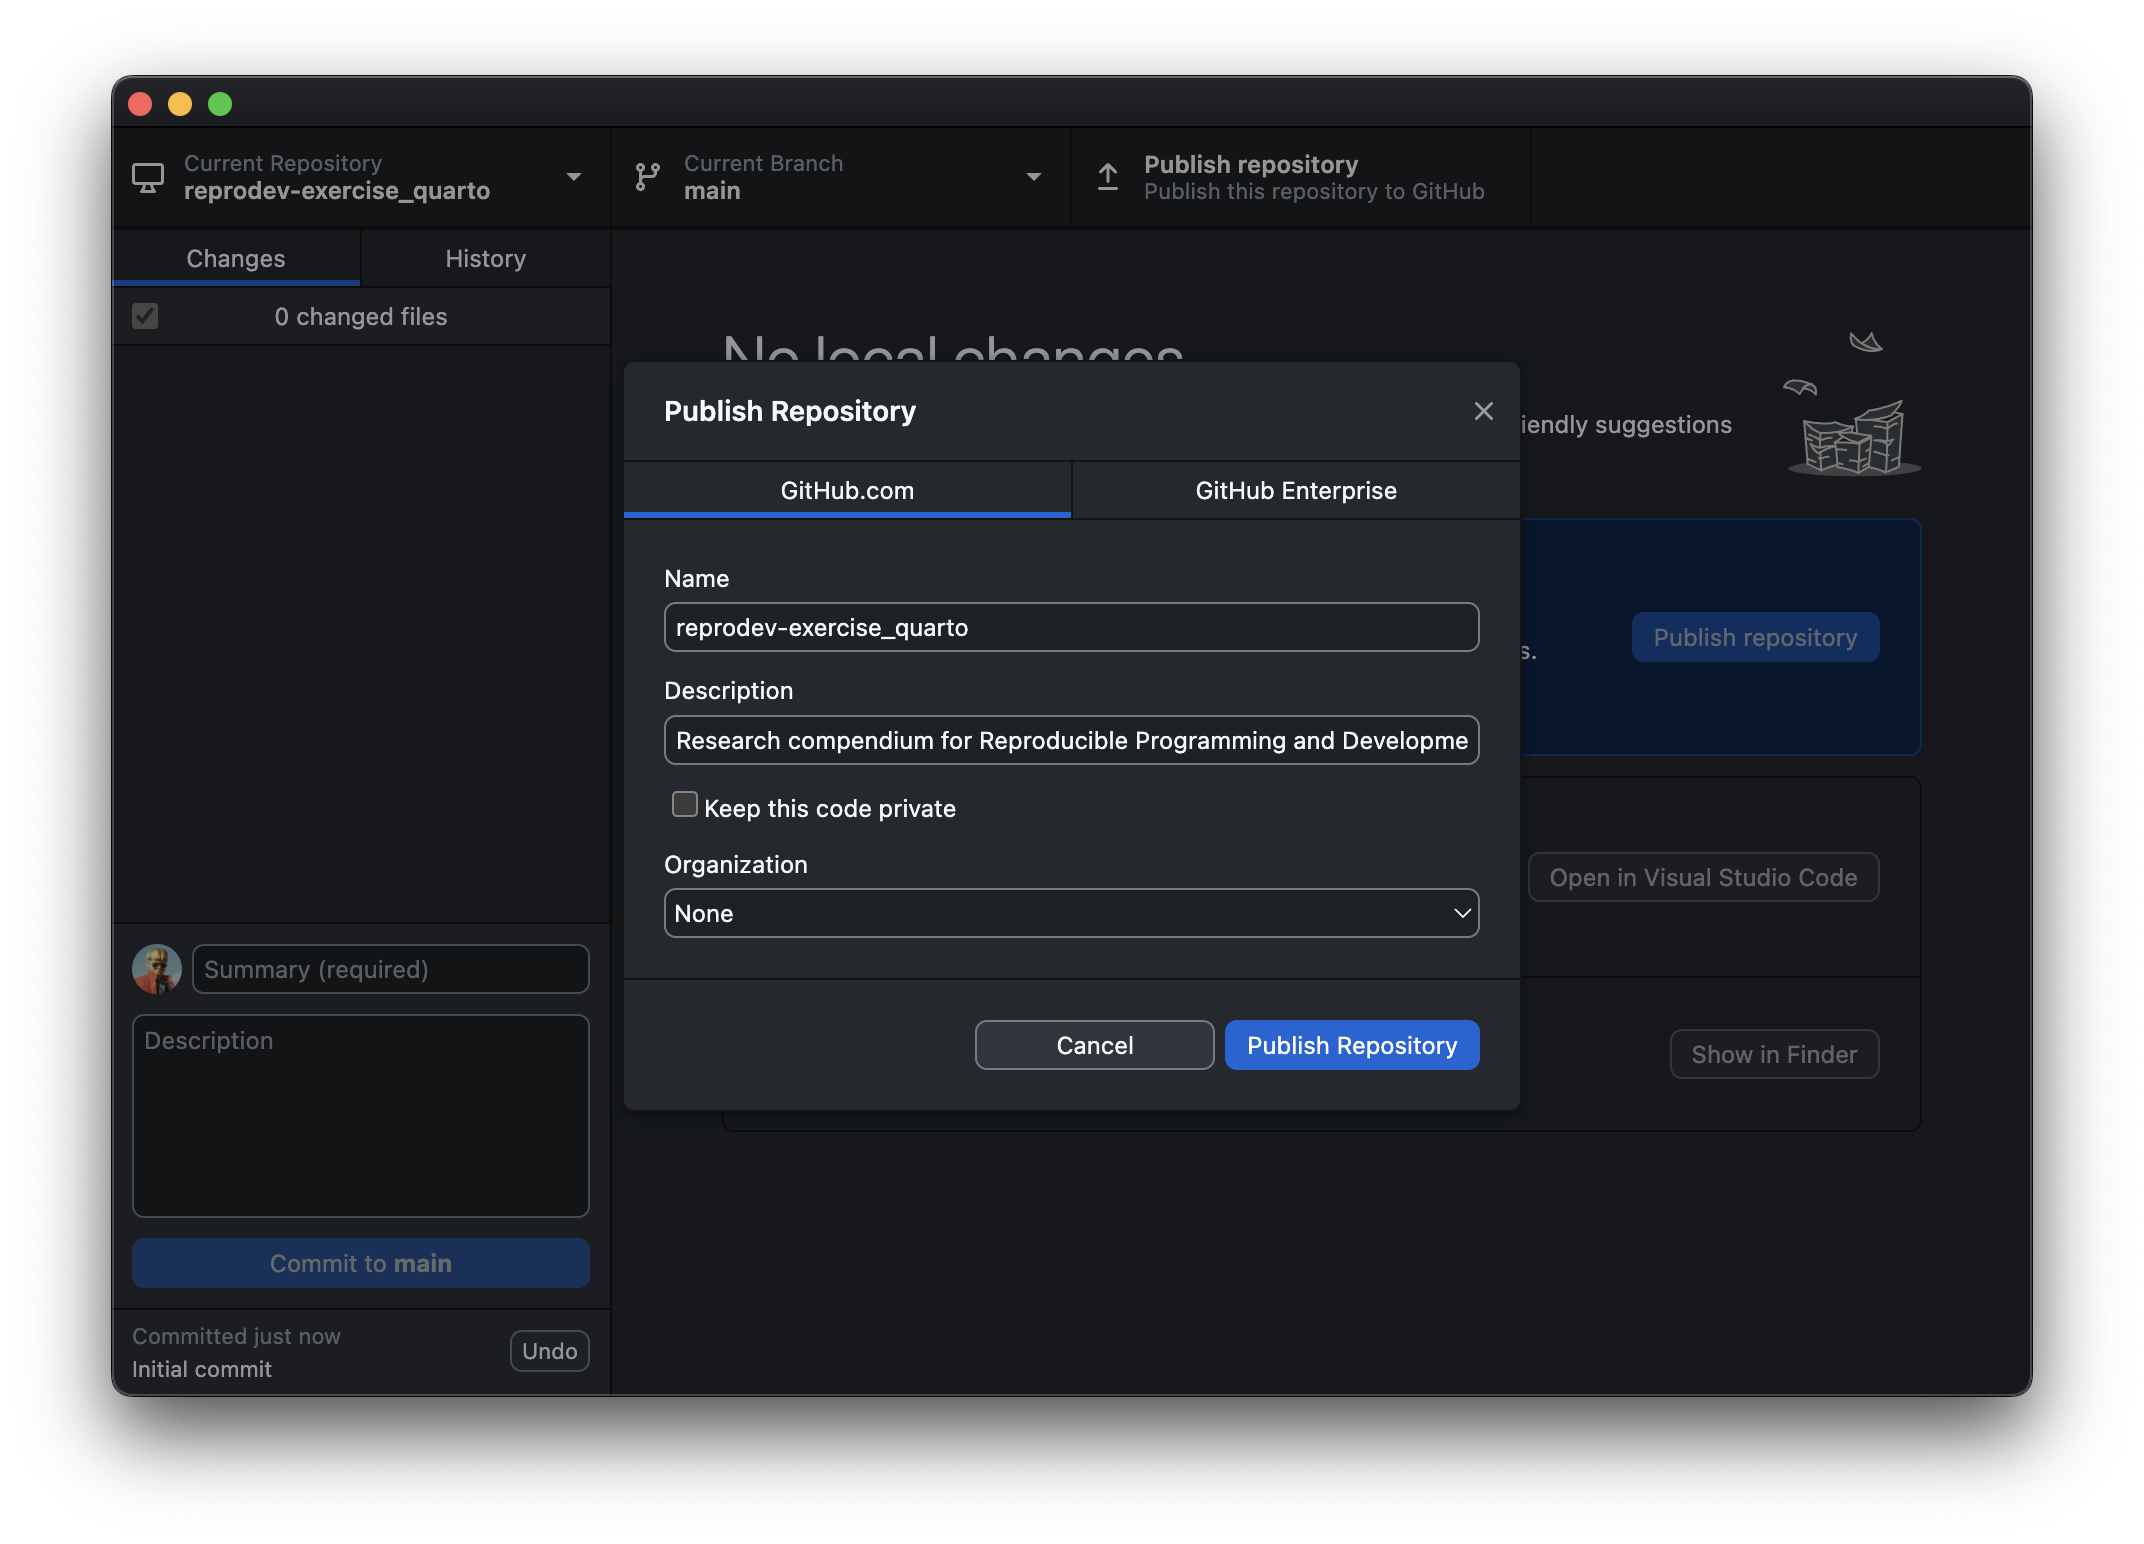
Now click Publish Repository and wait for the repo to be published.
This one is easy!
Add the content from Tutorial 1 to the folder that you just created. You can overwrite the README.md file with the one from Tutorial 1. There is no need to overwrite the .gitignore and LICENSE files, if relevant.
Make sure that you add all files and folders - also the hidden ones - to the git repository on your machine.
Are all folders detected?
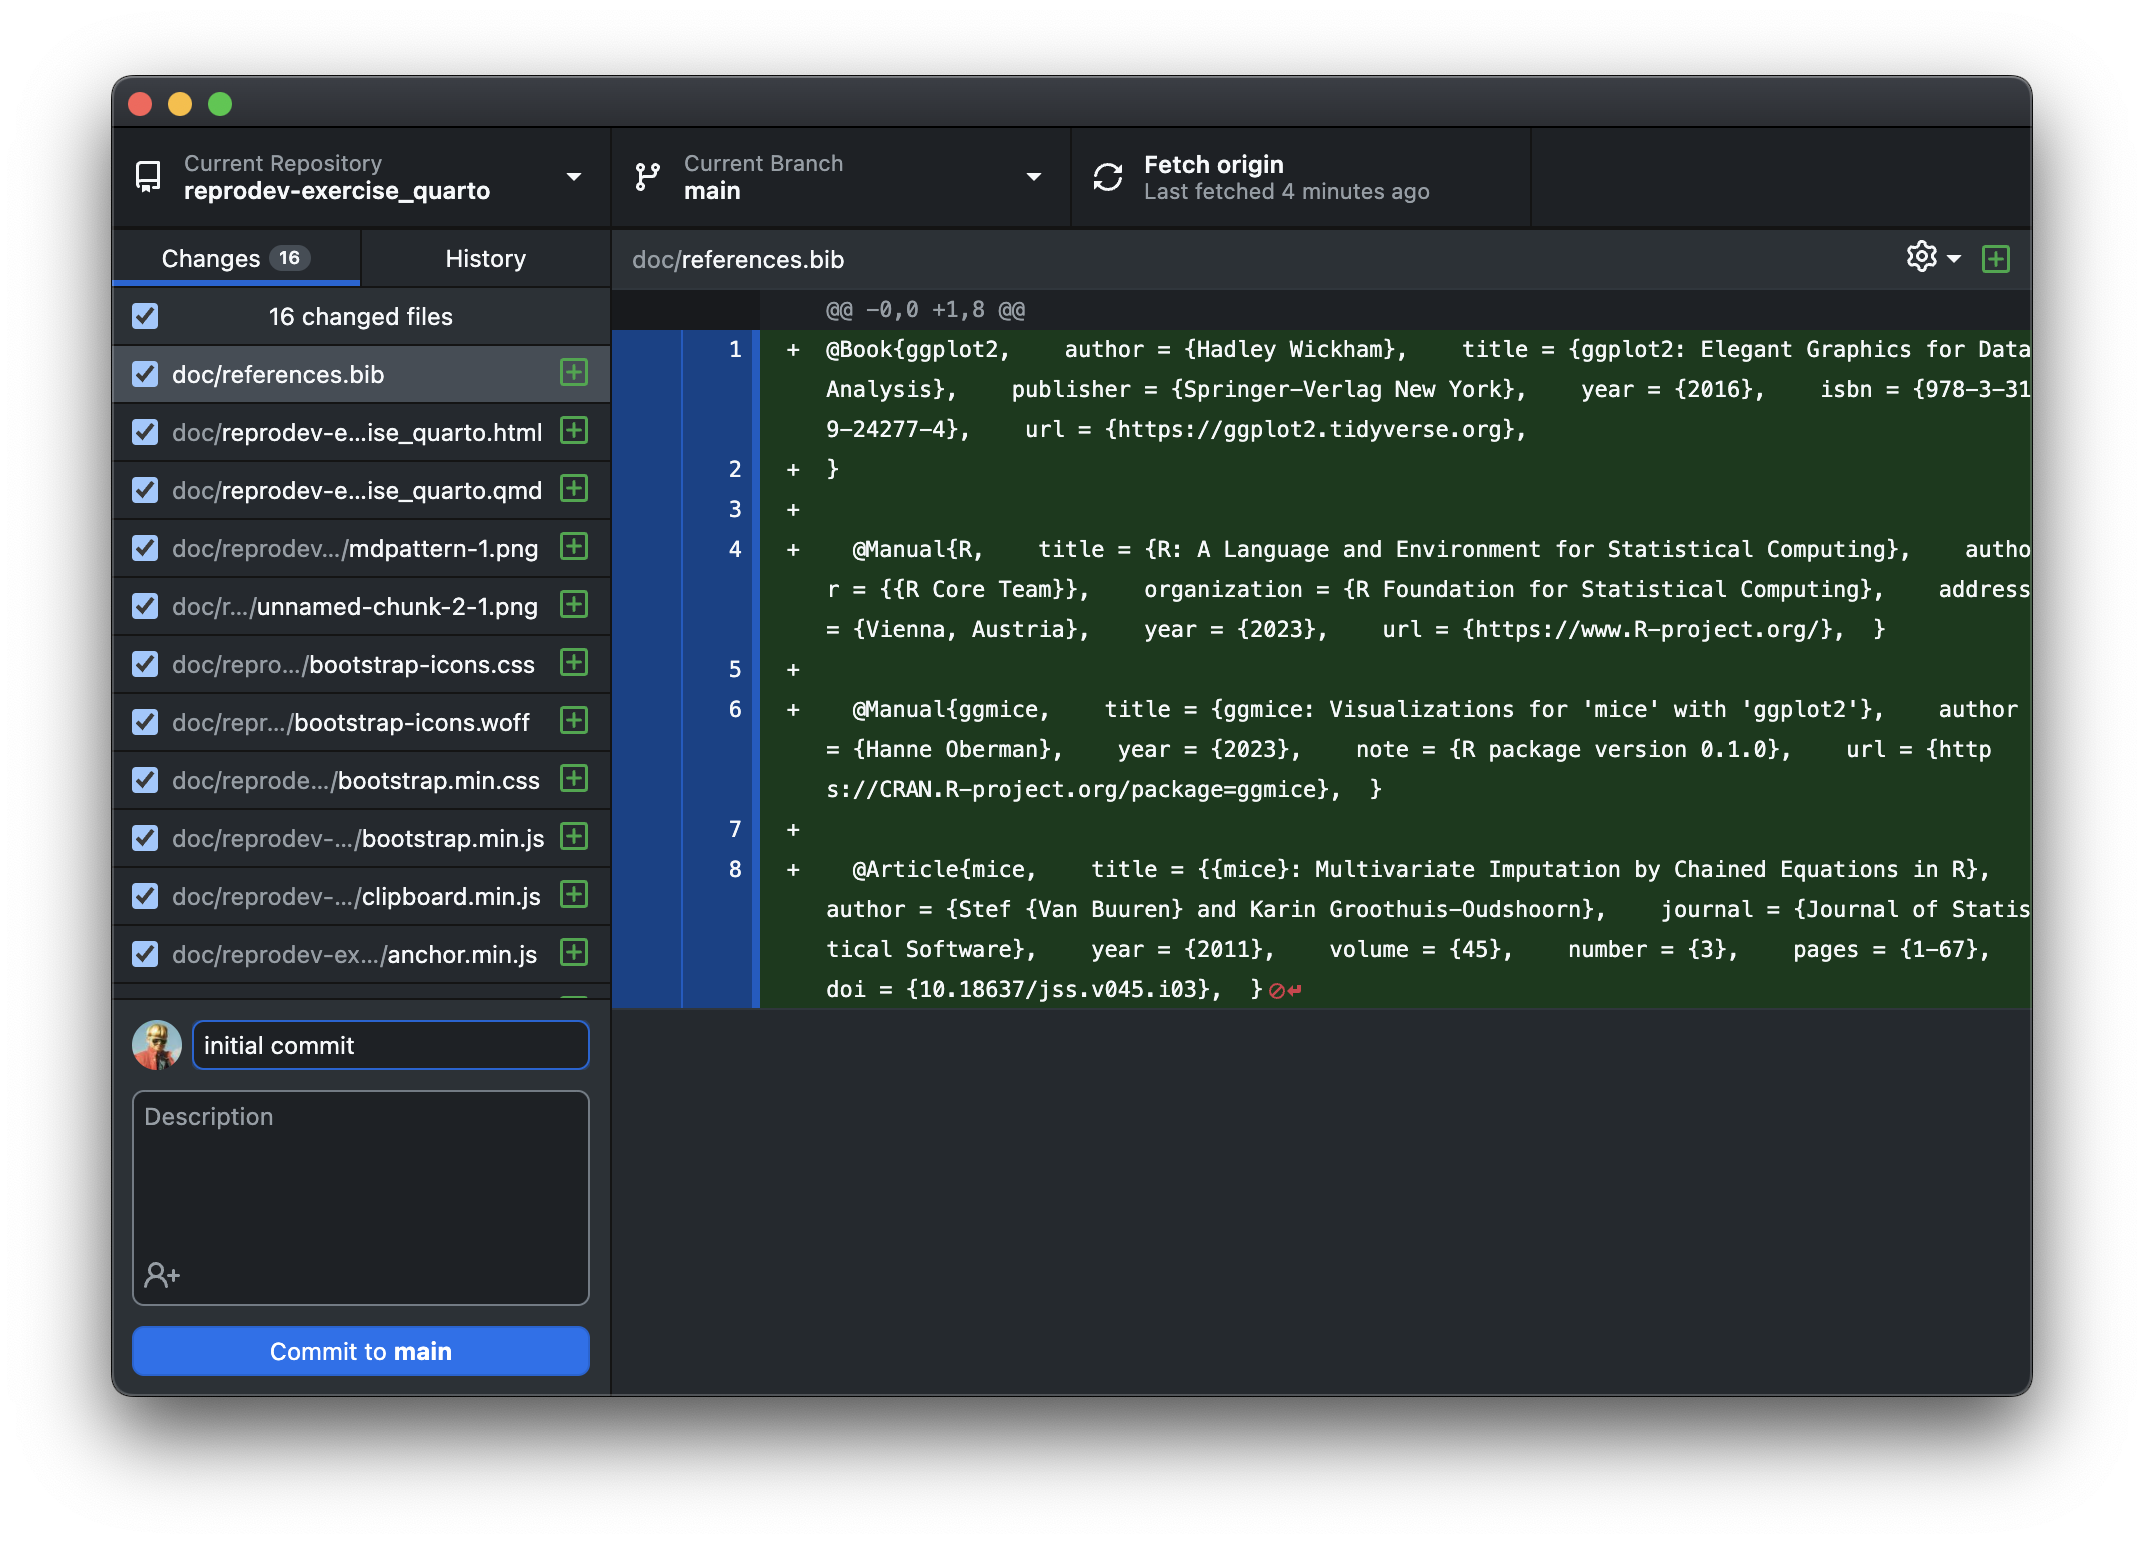
Make sure that all folders in your repo are detected by git. If you are using GitHub Desktop, you can check this by clicking on the Changes tab. If you are using the command line, you can use the git status command.
Depending on your platform, you might need to change the docs folder to doc or documents for it to be detected by git.
After making sure all changes to the folder are detected, create a commit message (initial commit is conventional) and click Commit to main, followed by Publish branch.
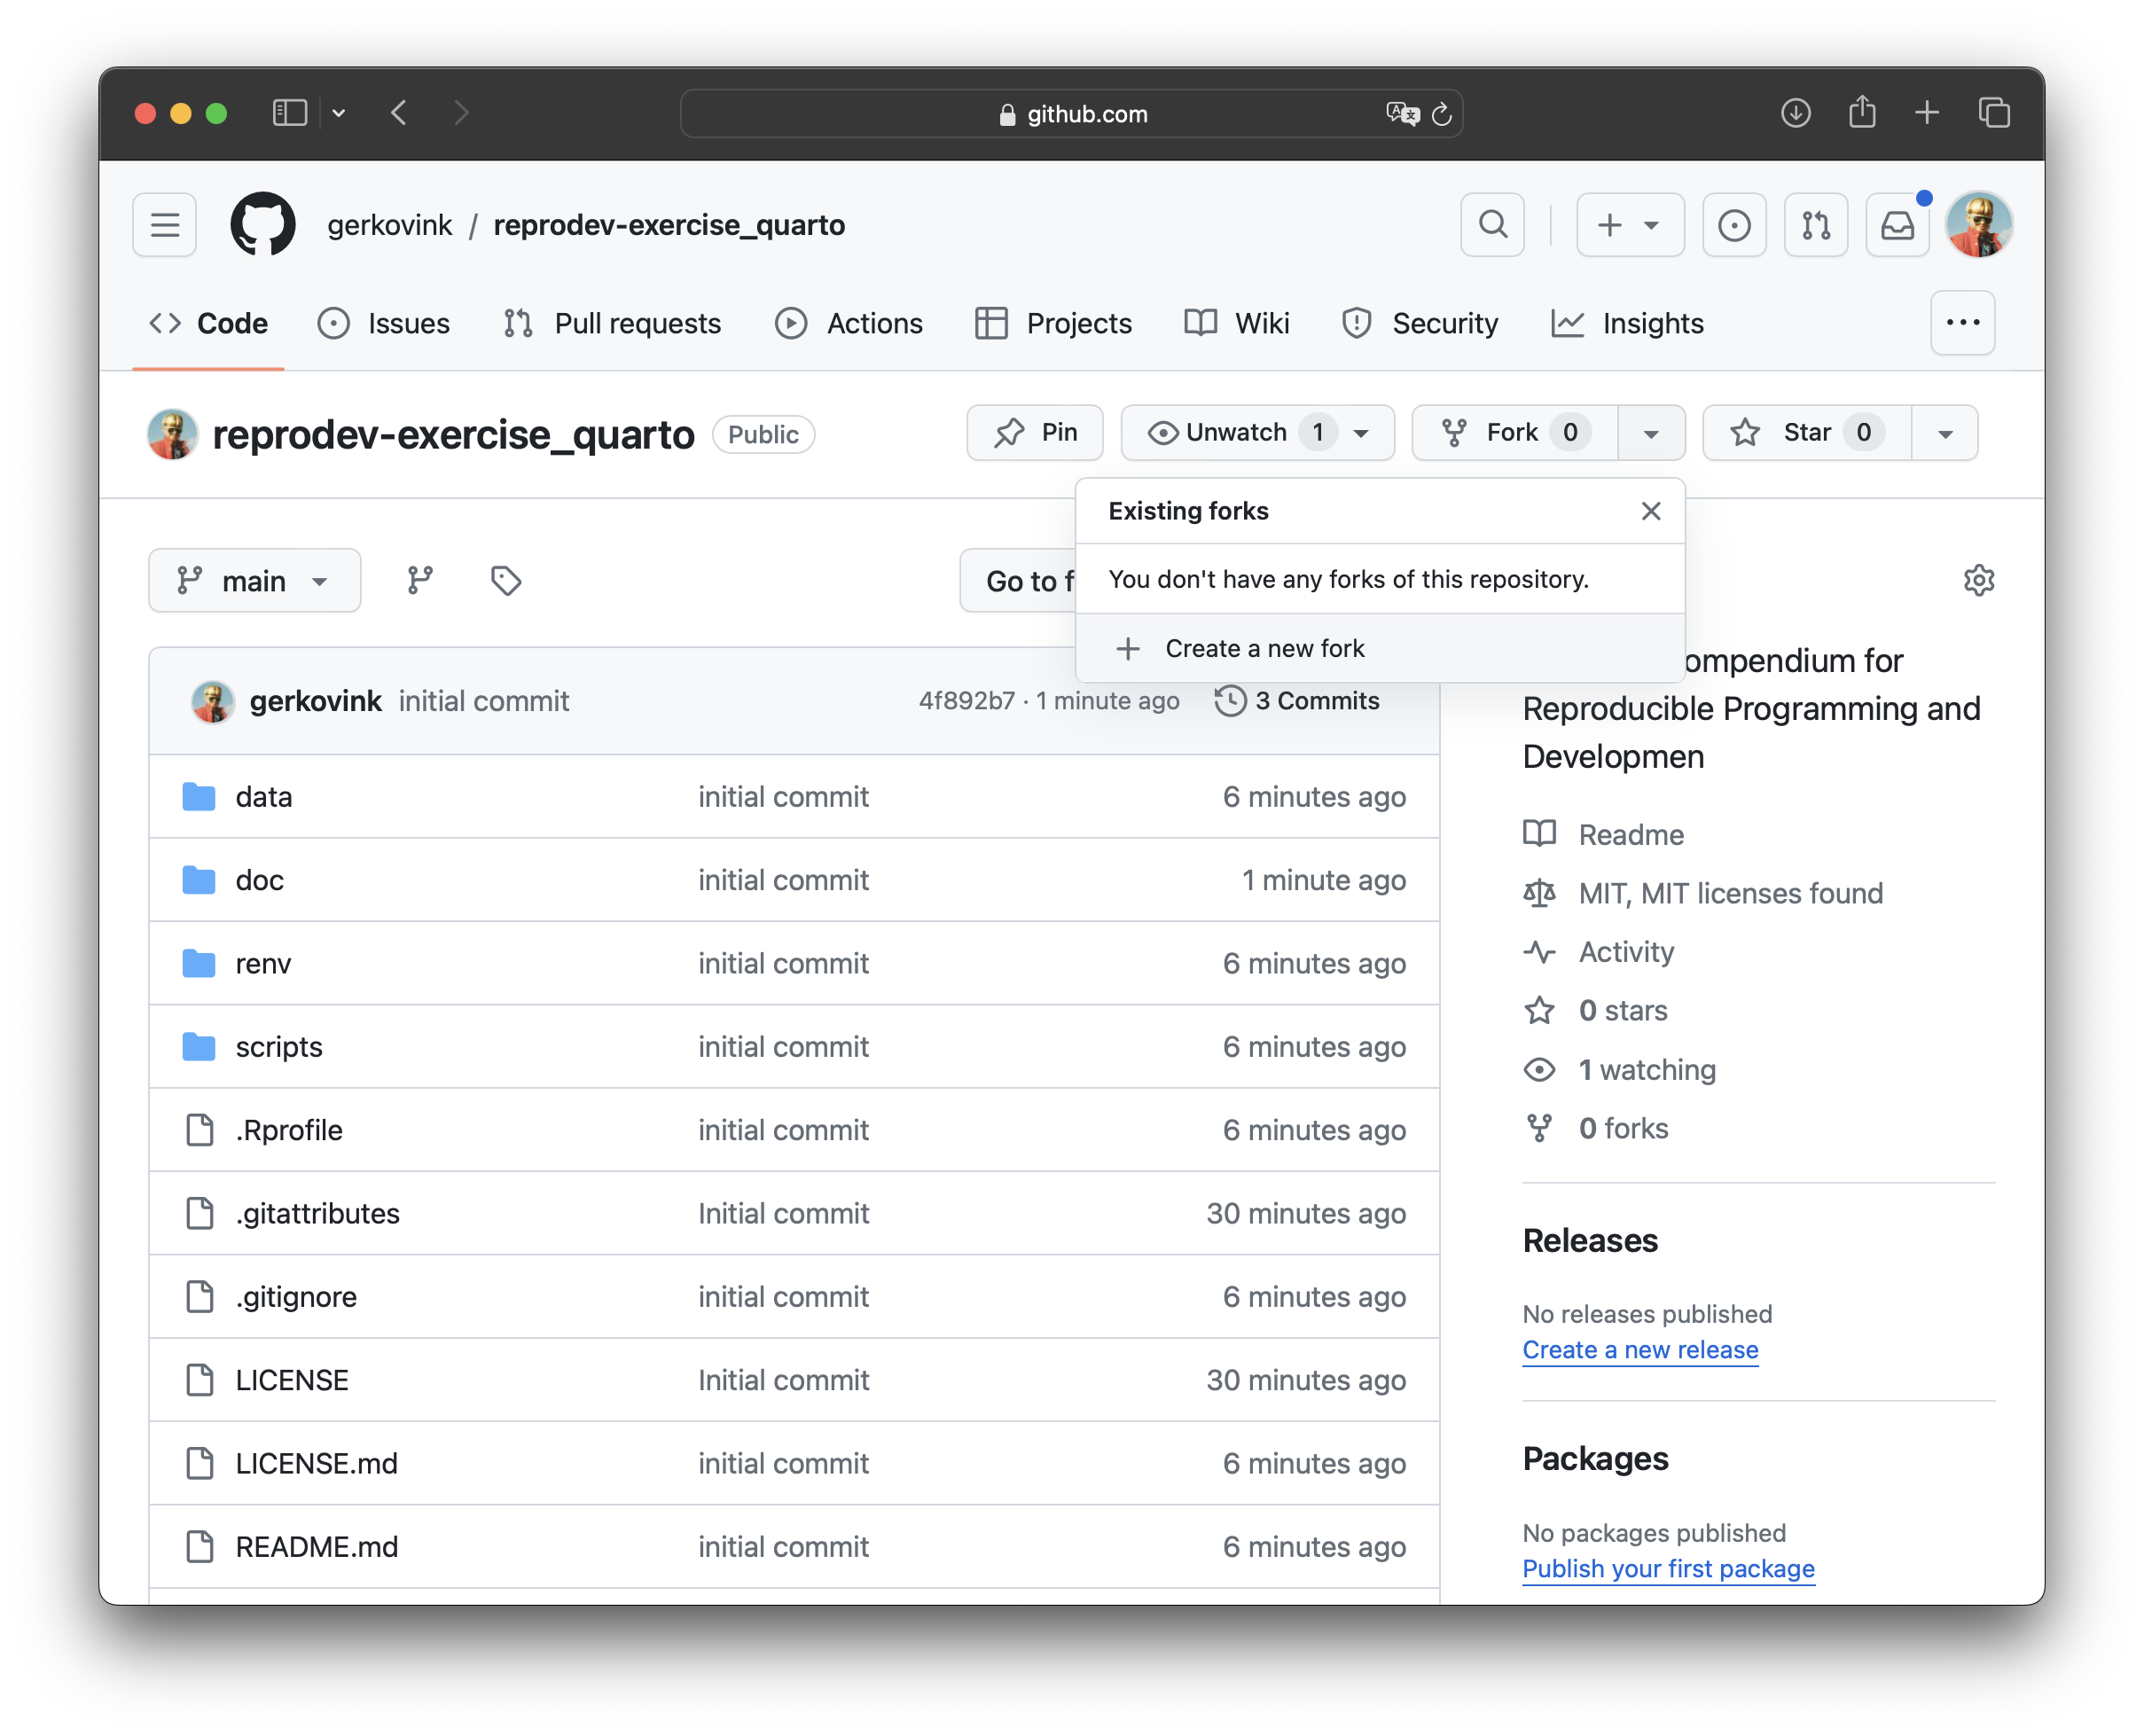
Now the contributors (Team B) will fork the repository.
- Find the repository on
GitHuband click Fork.
- copying the main branch only will suffice
- Clone the repository to your computer by clicking on the green code button and choosing Open with GitHub Desktop as the clone method.
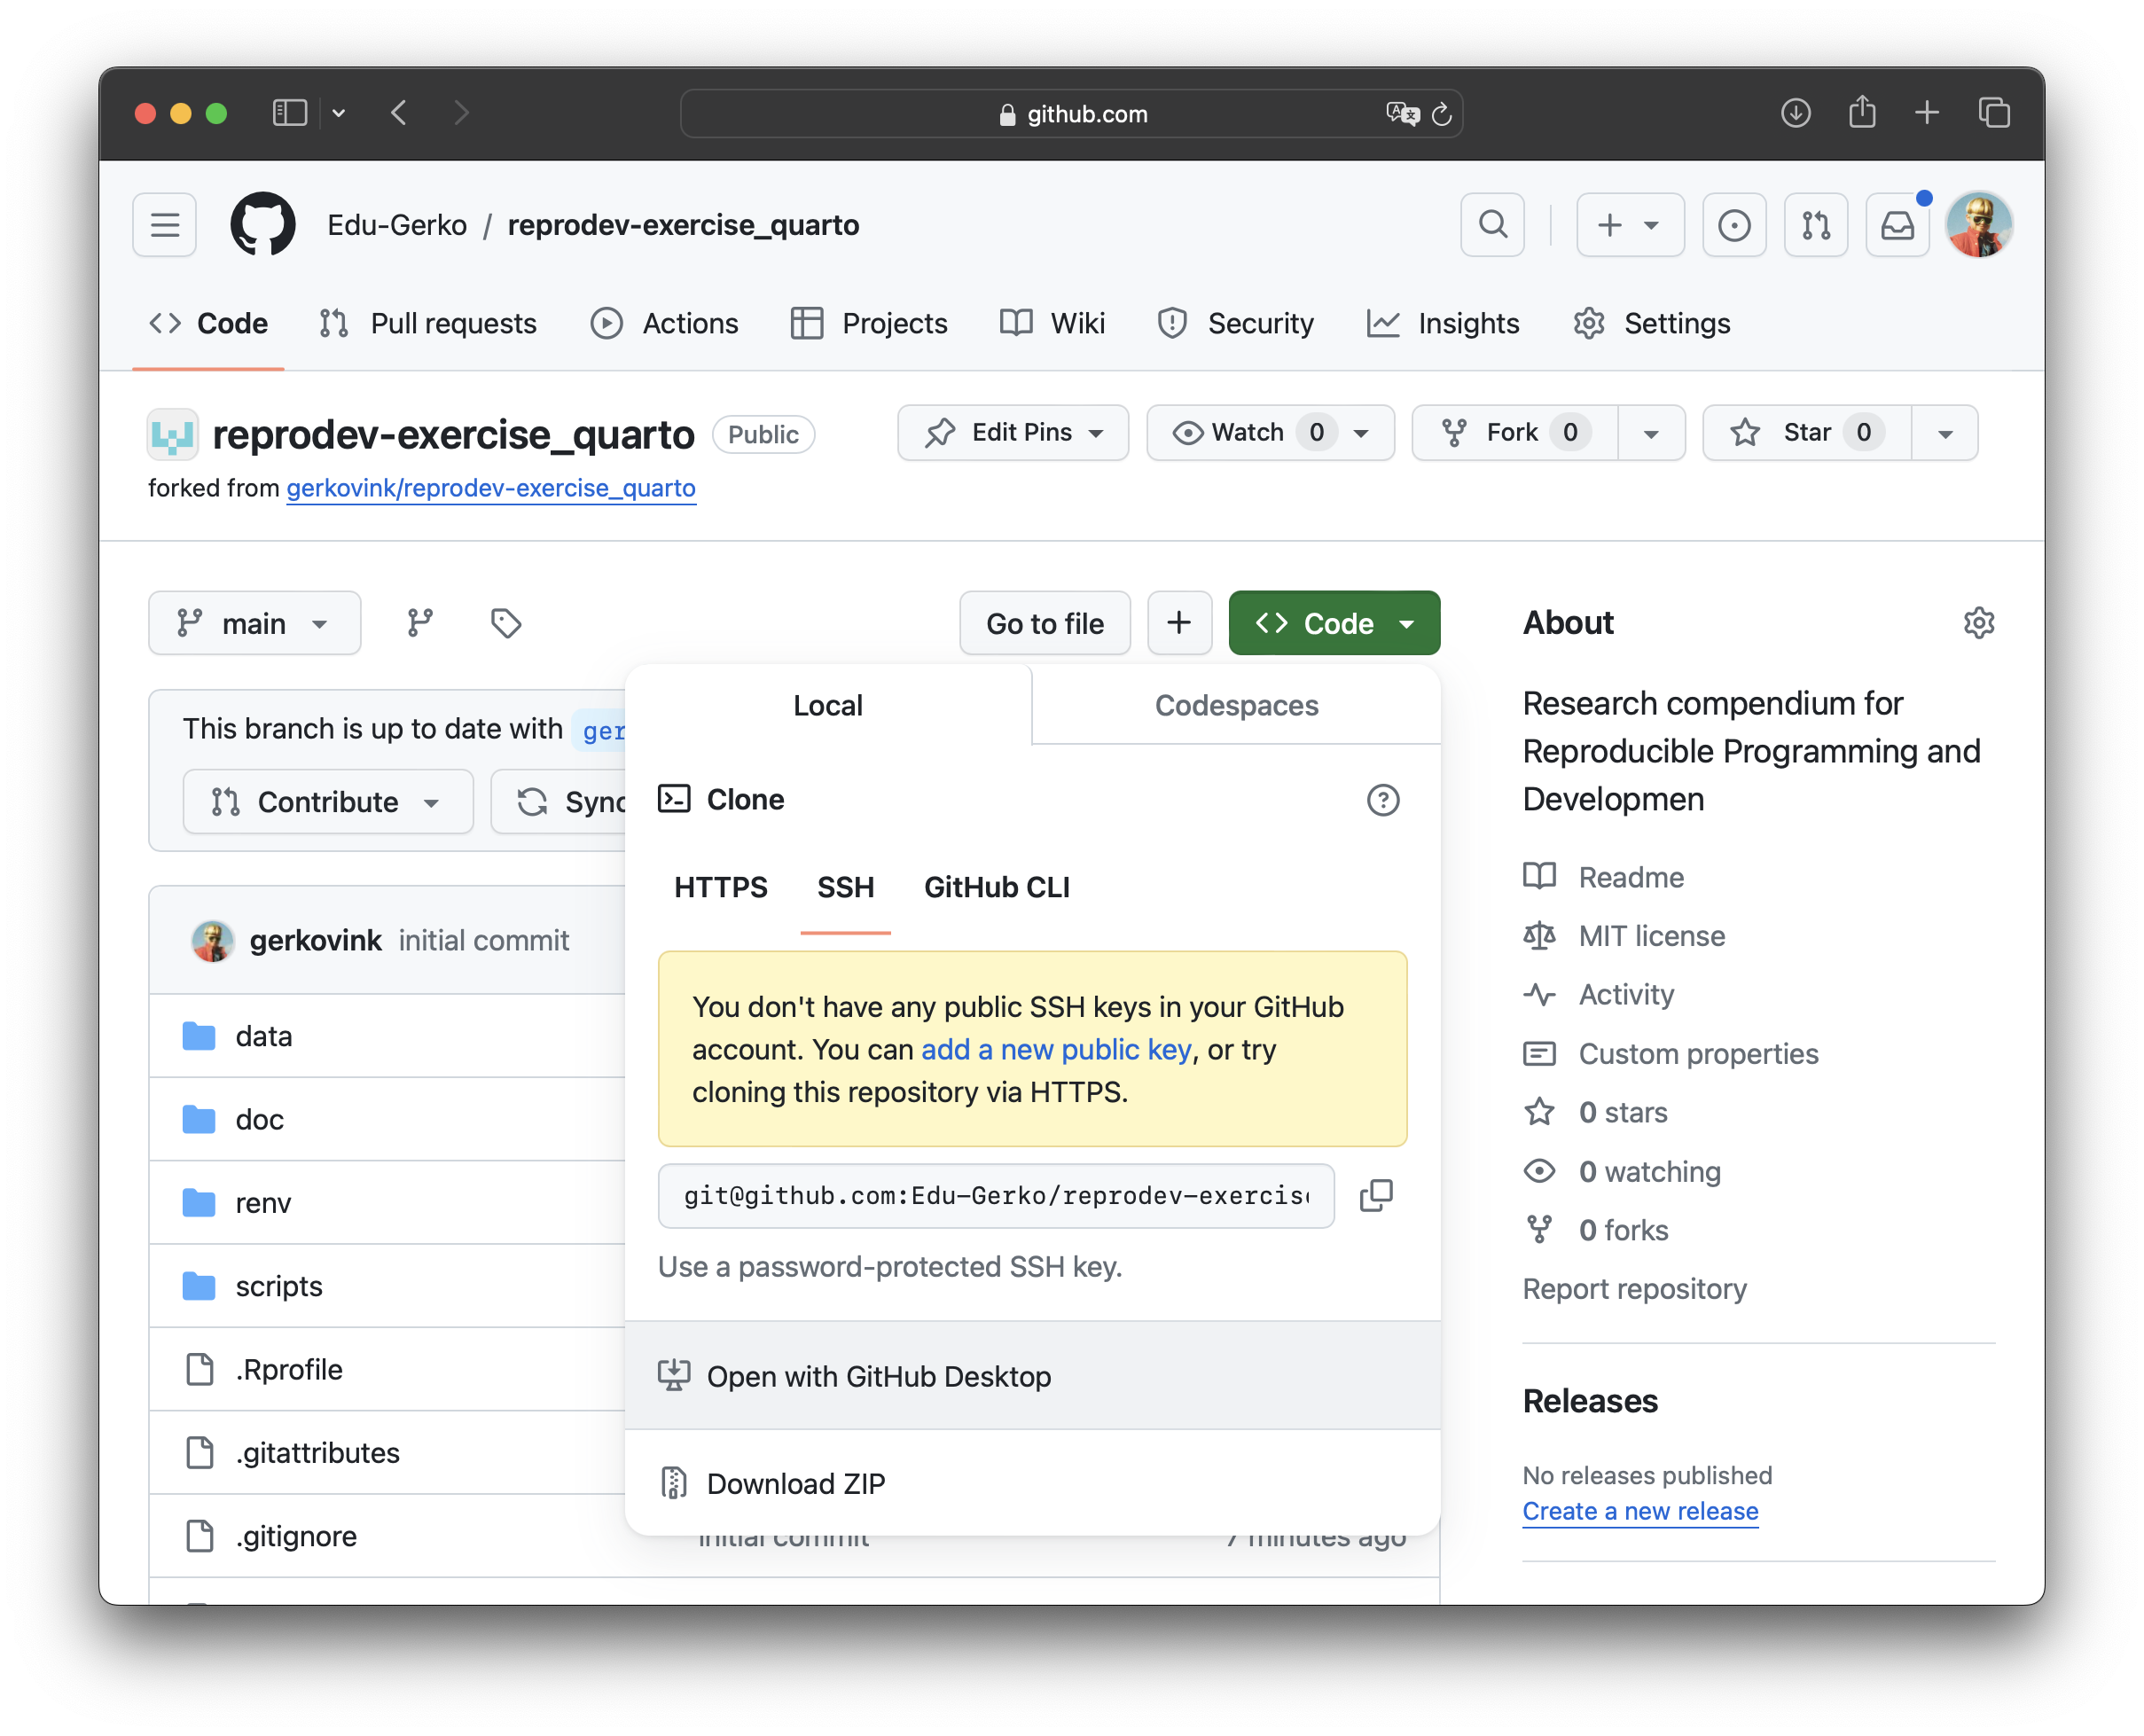
- Choose a location on your computer and click Clone.
Never work on the main branch. Always create a new branch for your work.
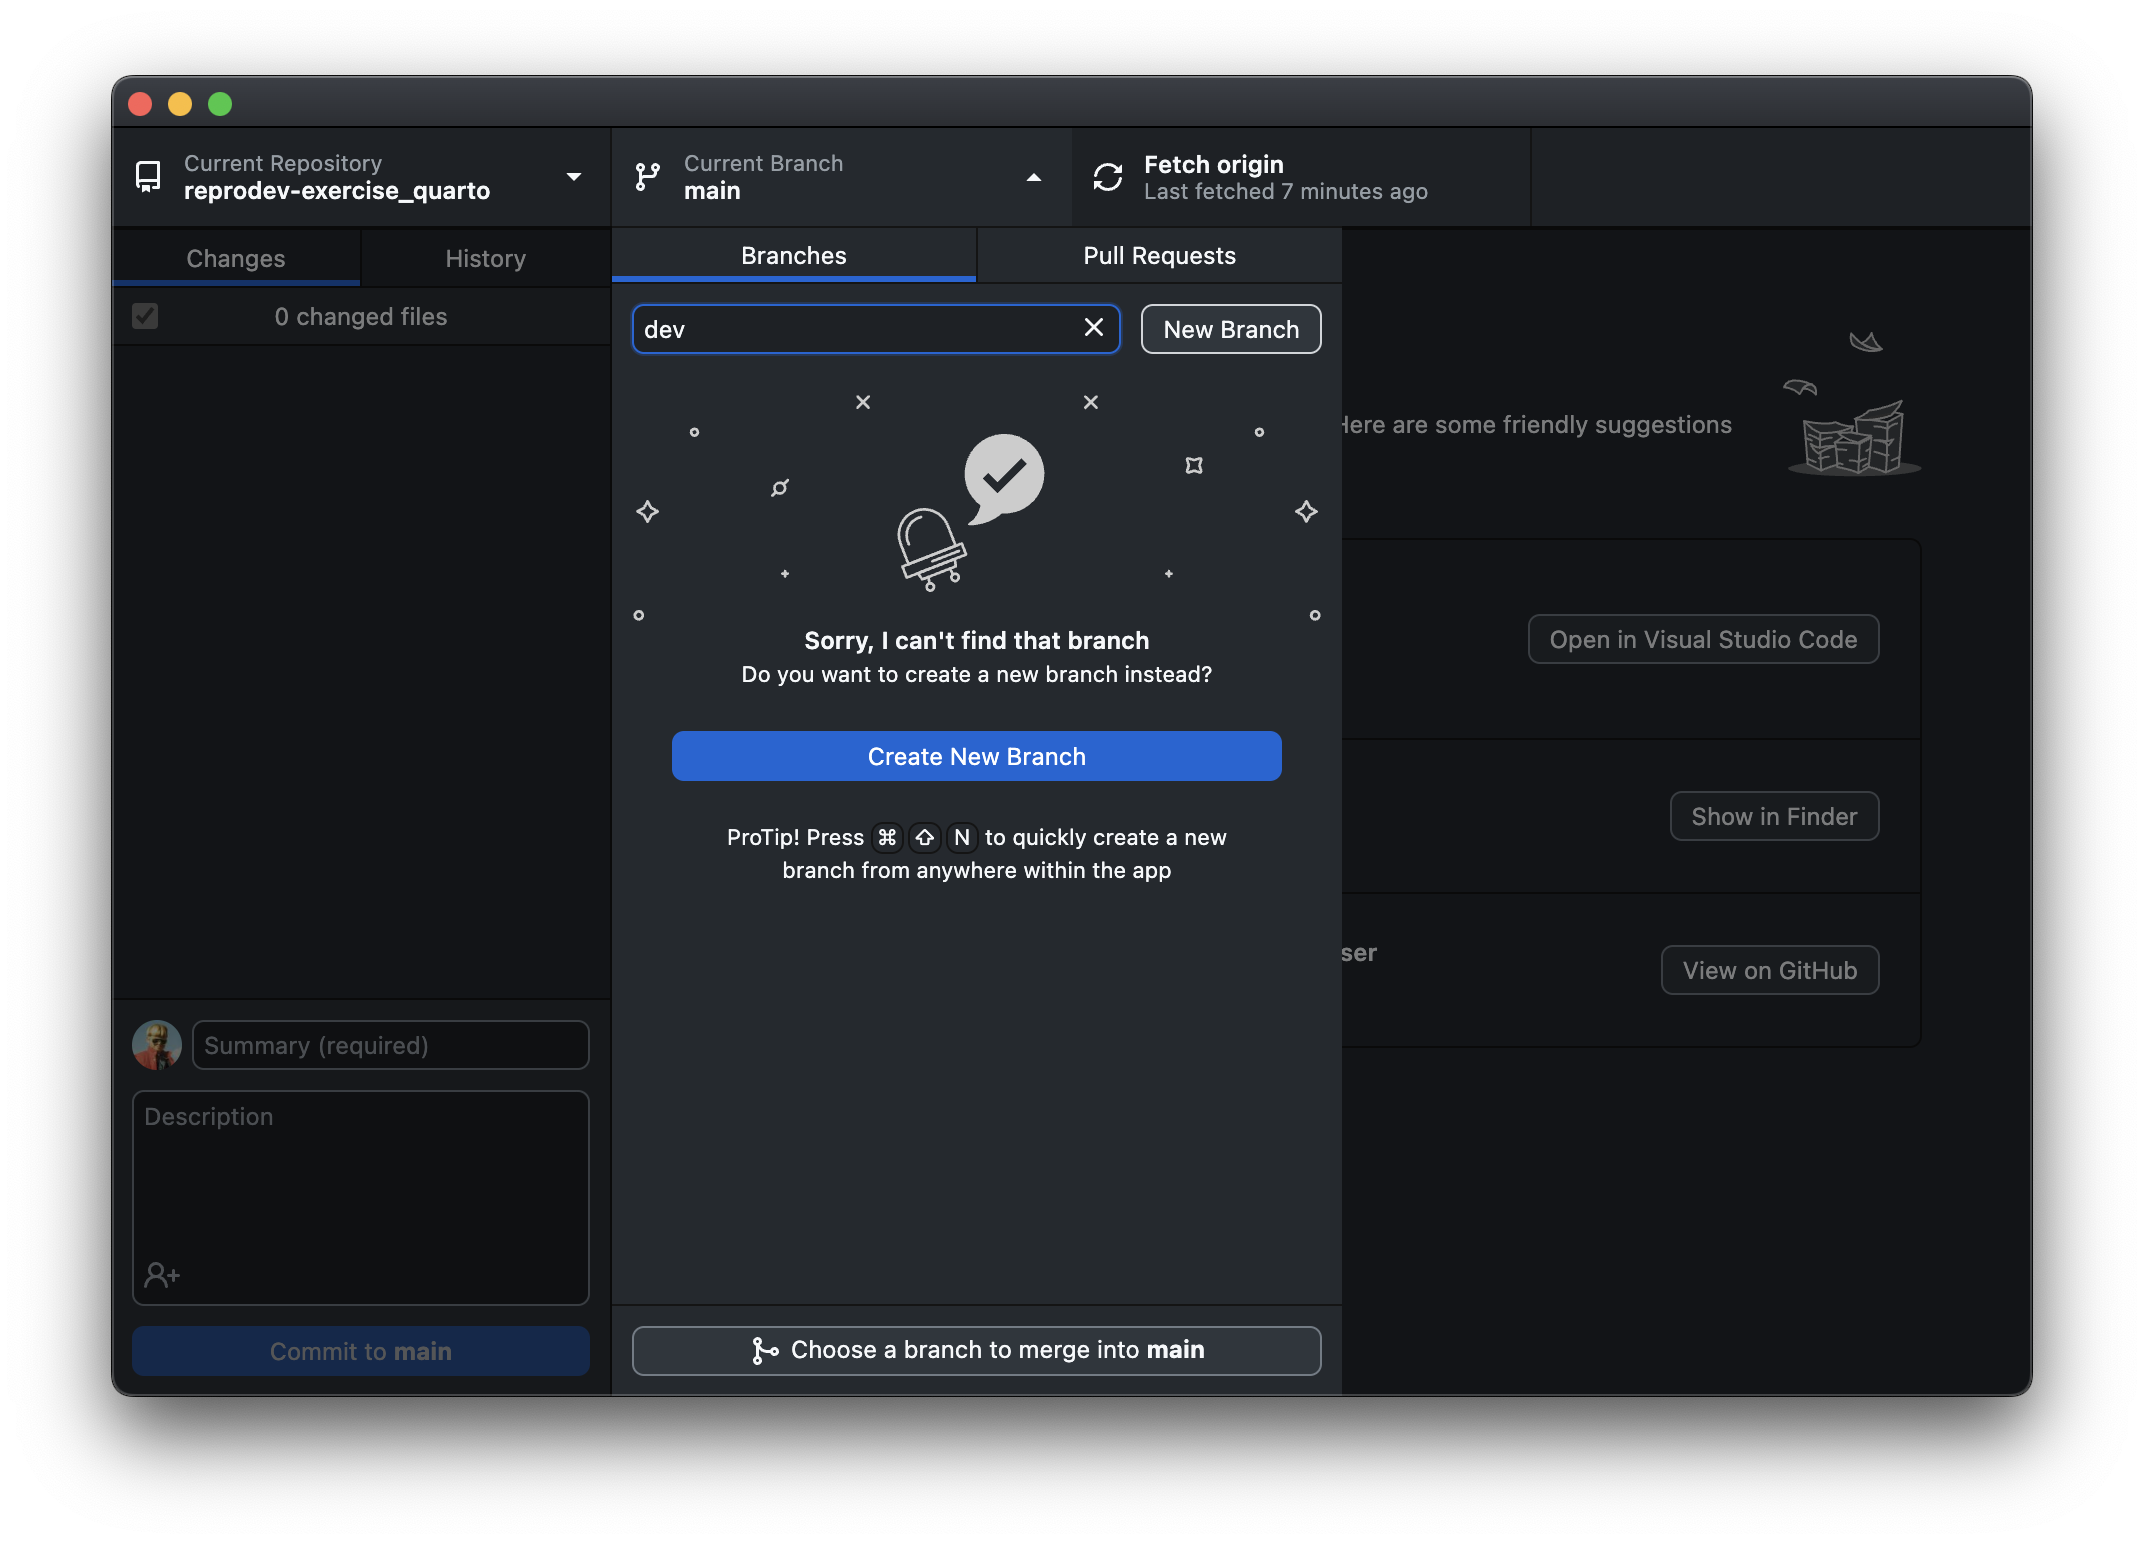
- Choose Branch > New Branch and give the branch a name.
devis a common name for a development branch
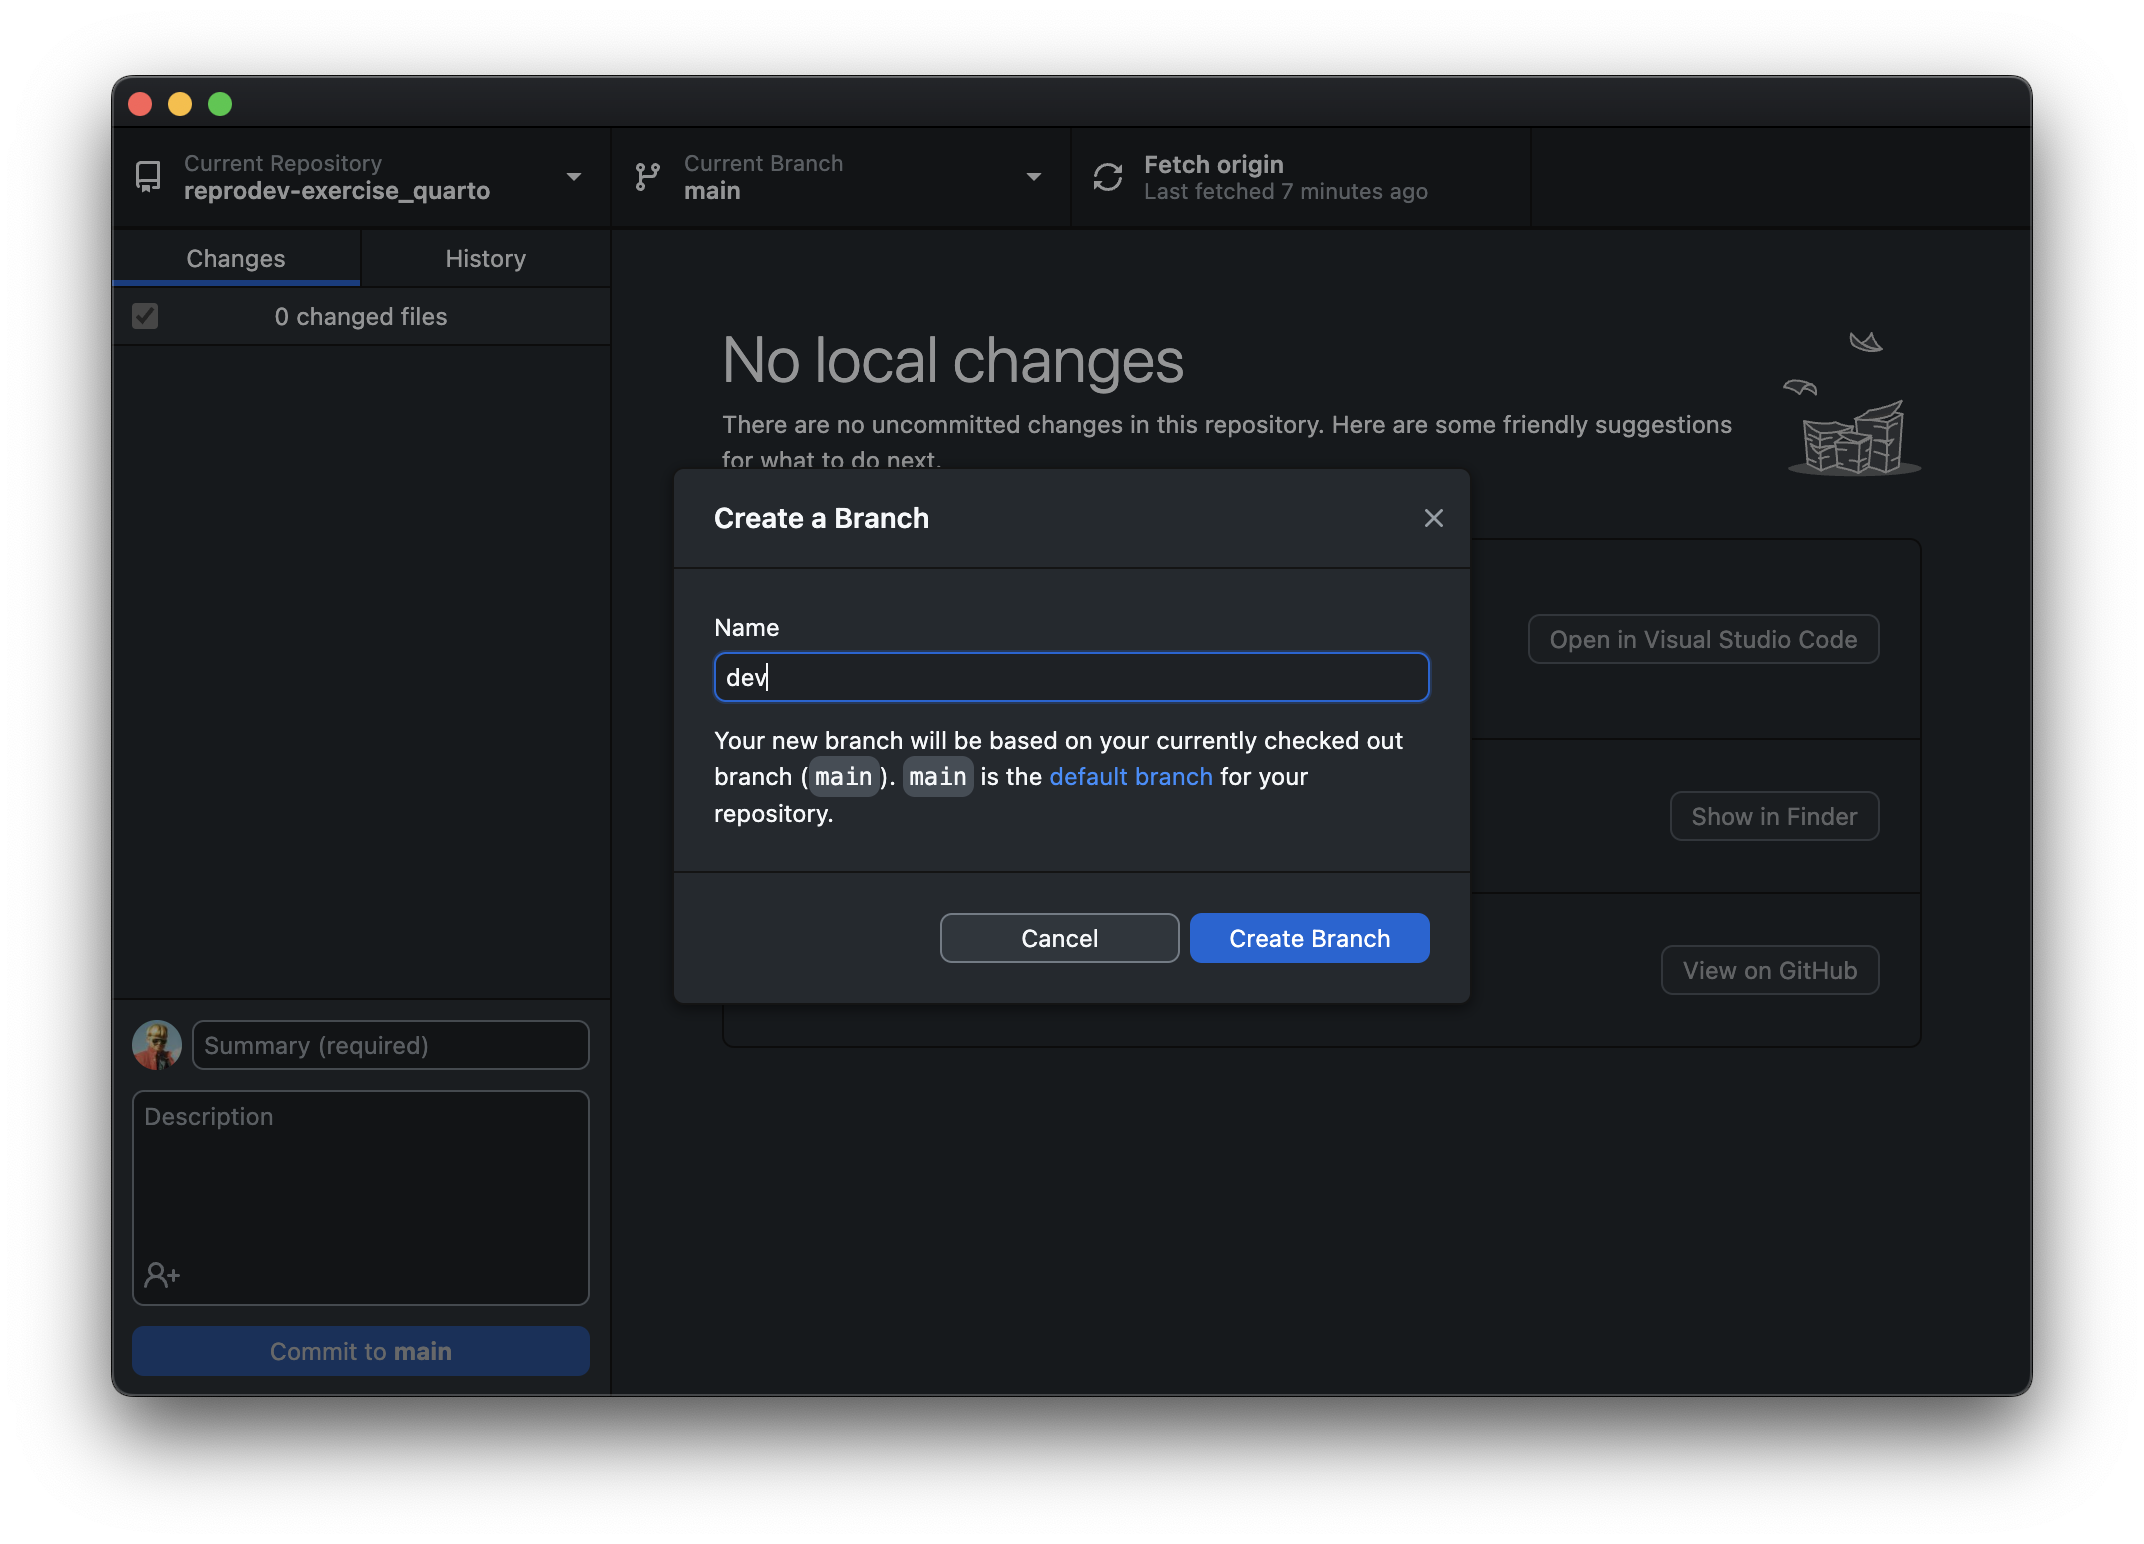
- Now you can start working on the repository.
This is a free exercise. You must add something to the Quarto file and re-render.
- Use your creativity and add two things to the
Quartofile from Tutorial 1.
- The funniest image you know or can find
- The funniest or coolest video you know or can find
Re-render the
Quartofile and make sure that the changes are visible in the html folder.Commit the changes to the repository and push the changes to your fork of the repository on
GitHubby clicking Publish branch.
Now that you have contributed to the project and have made changes to the repository, you can create a pull request to the main repository.
- Go to the forked repository on
GitHuband click on Compare & pull request.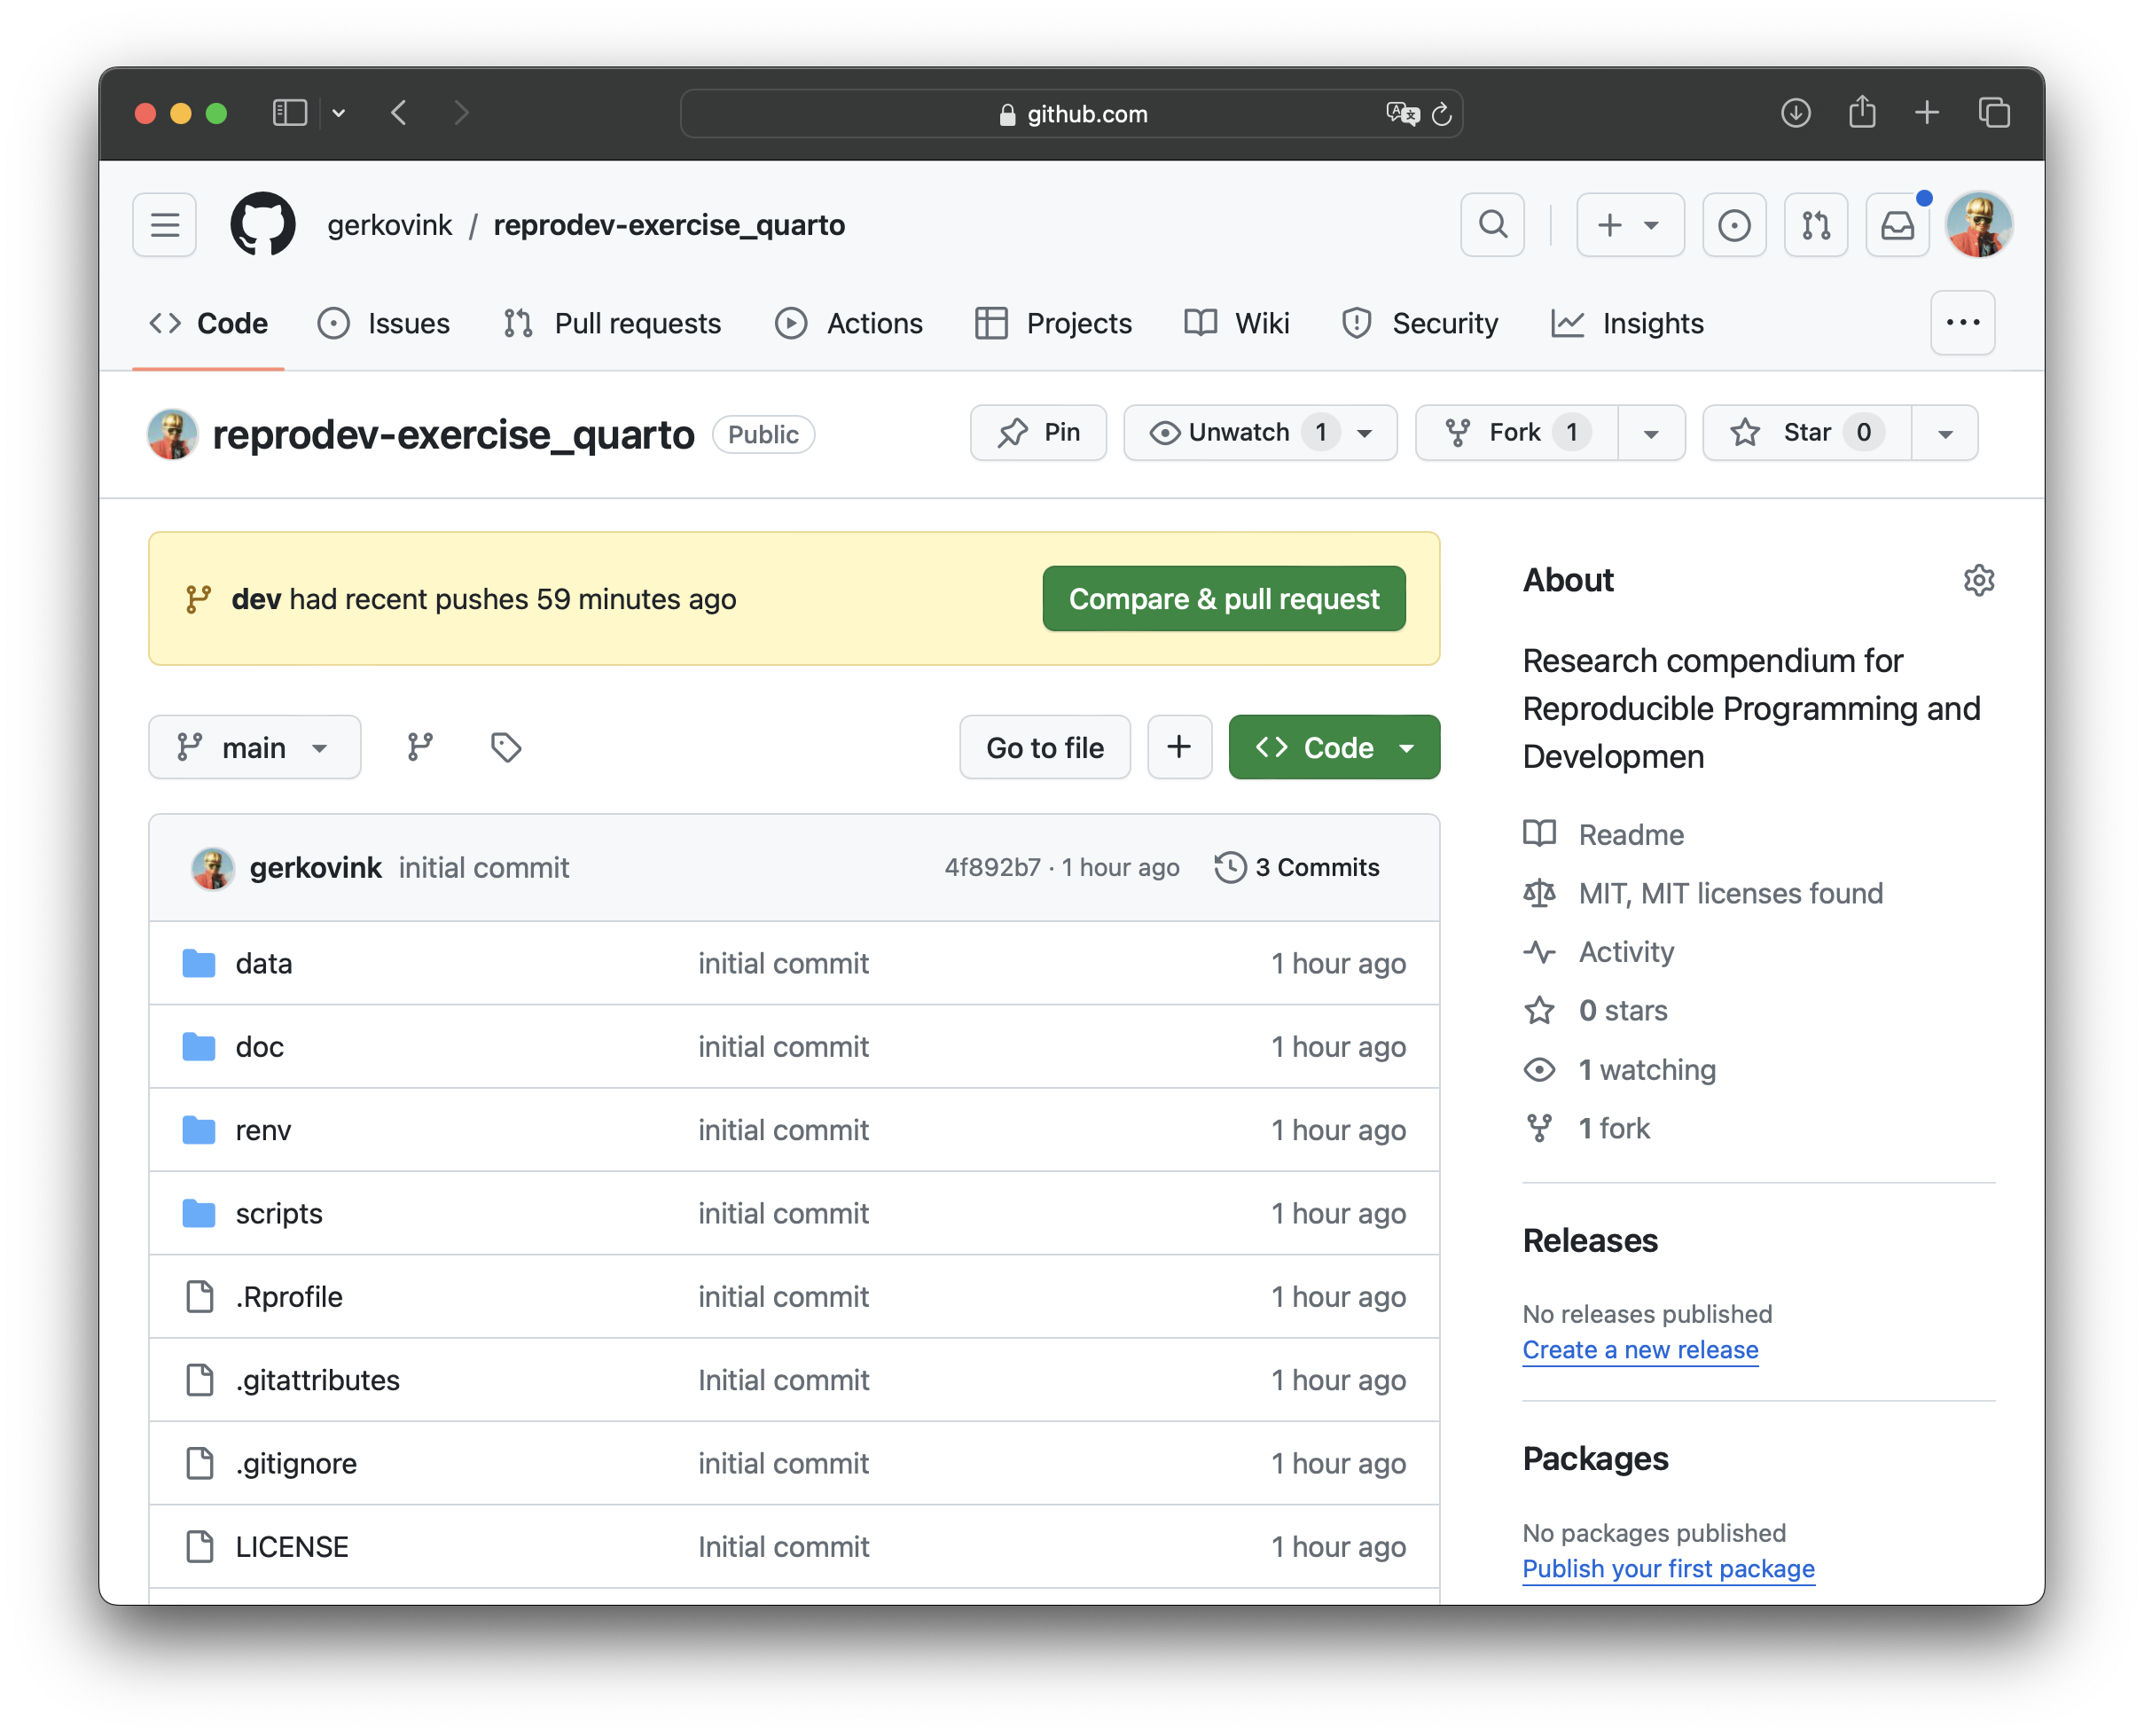
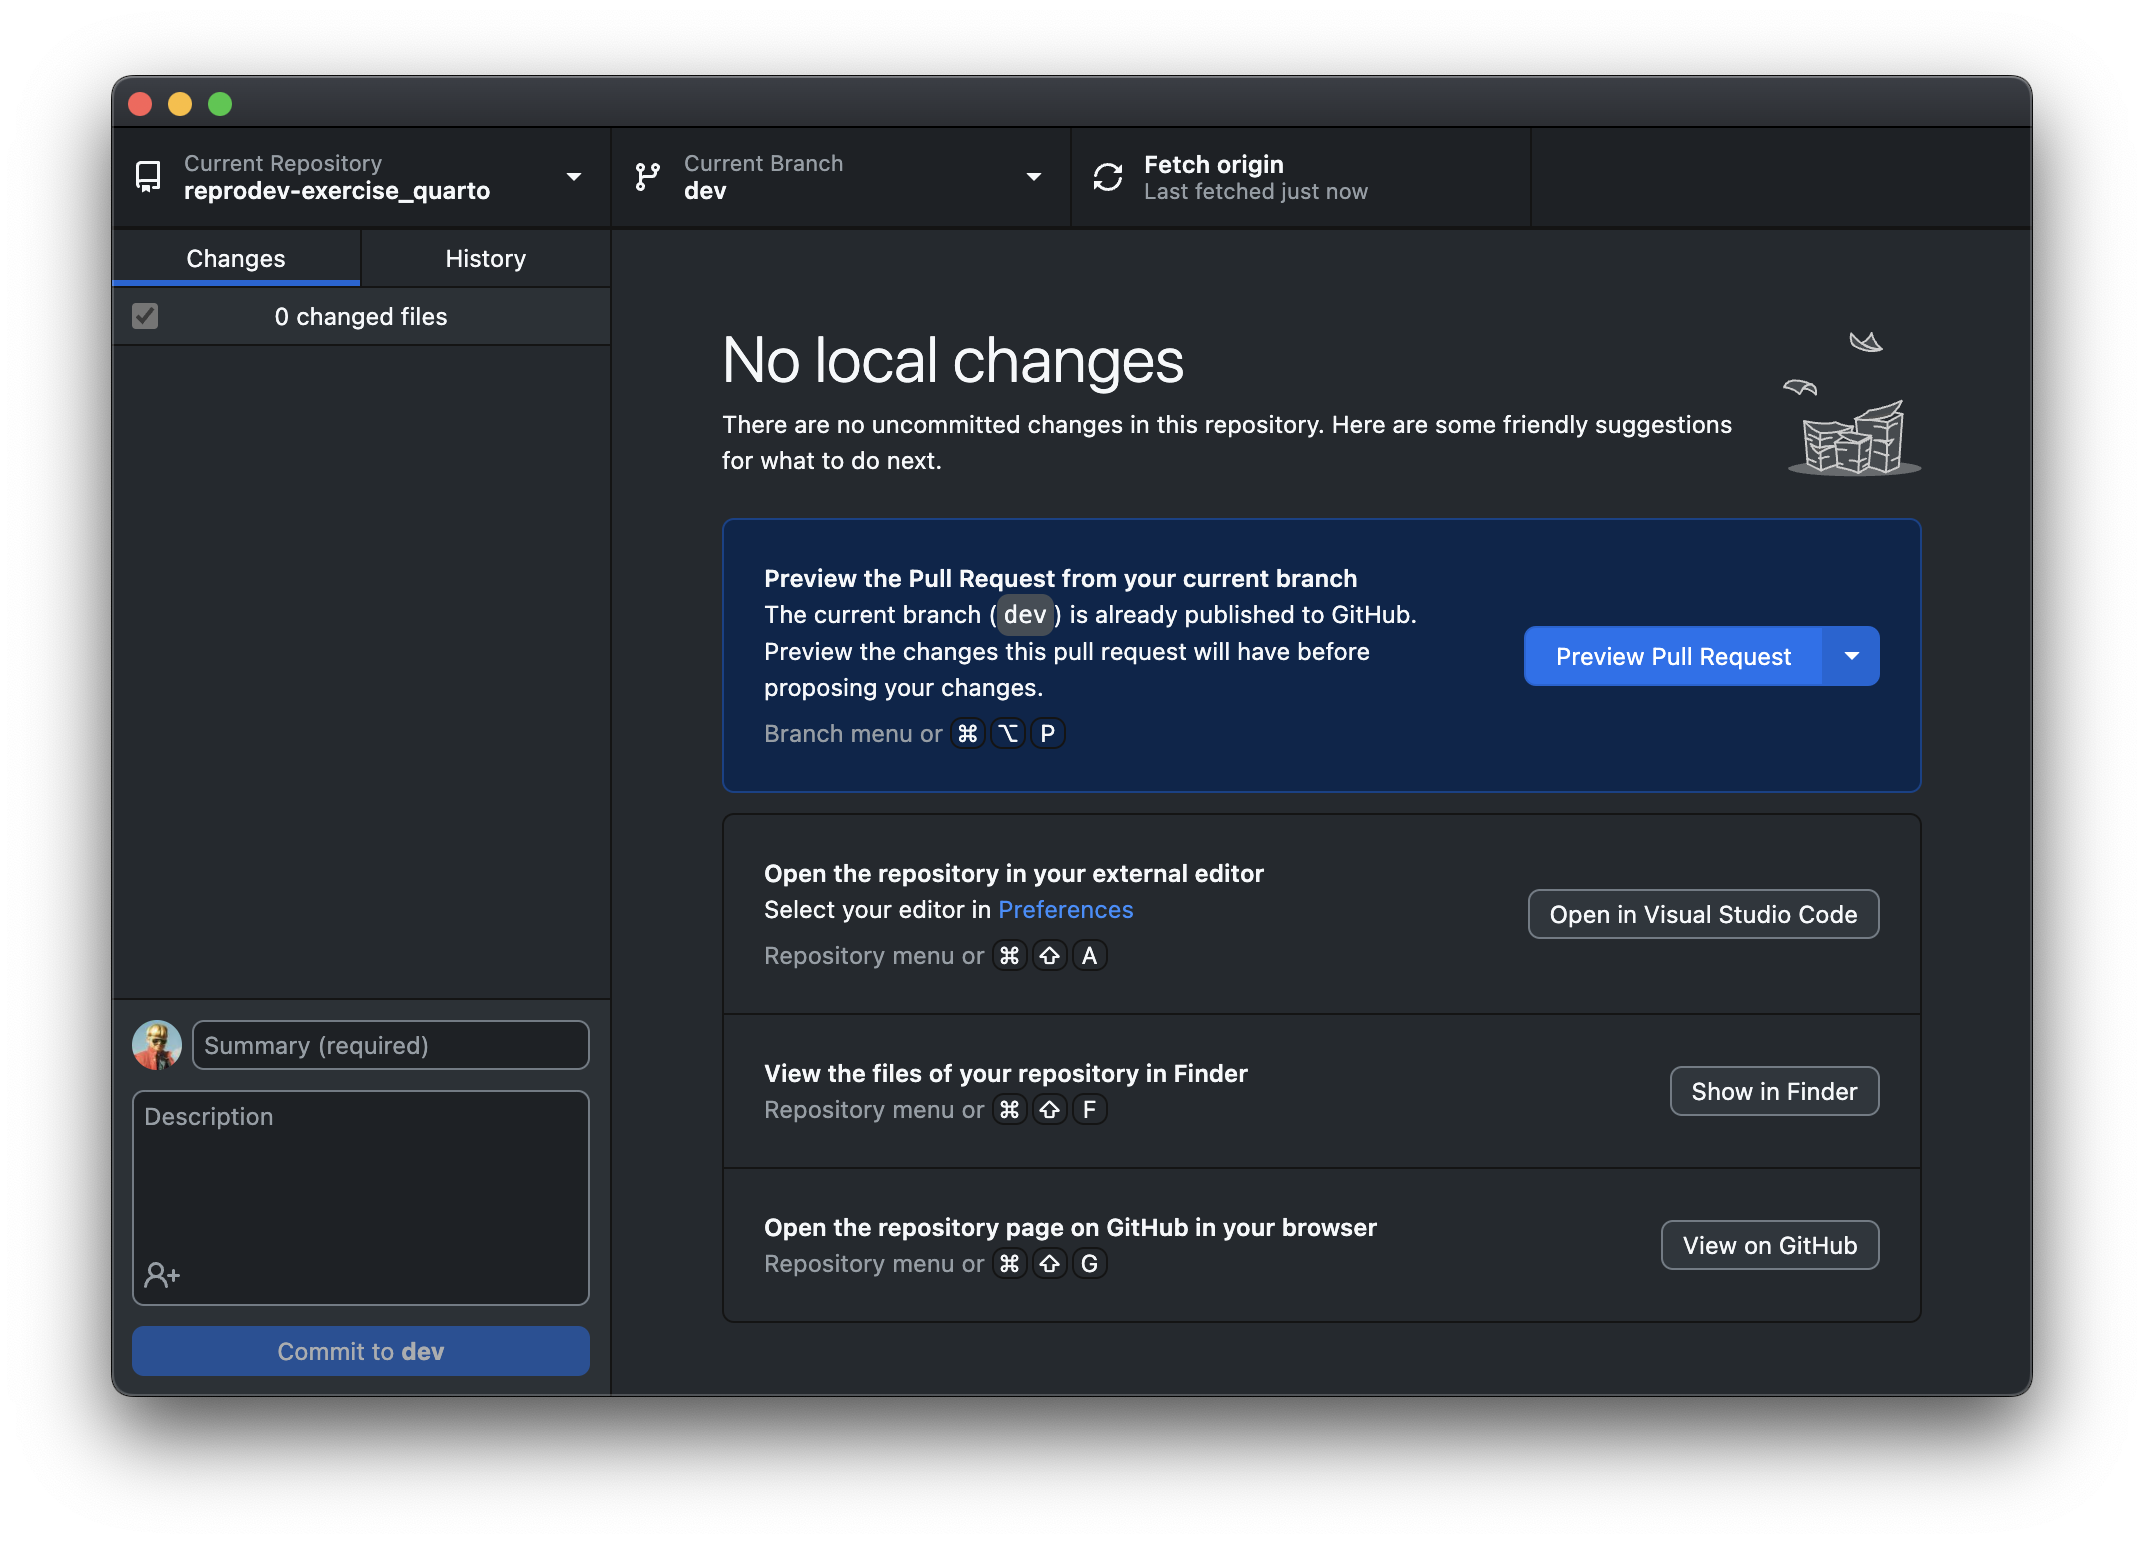
Alternatively, you can click on the Preview Pull request button in GitHub Desktop.
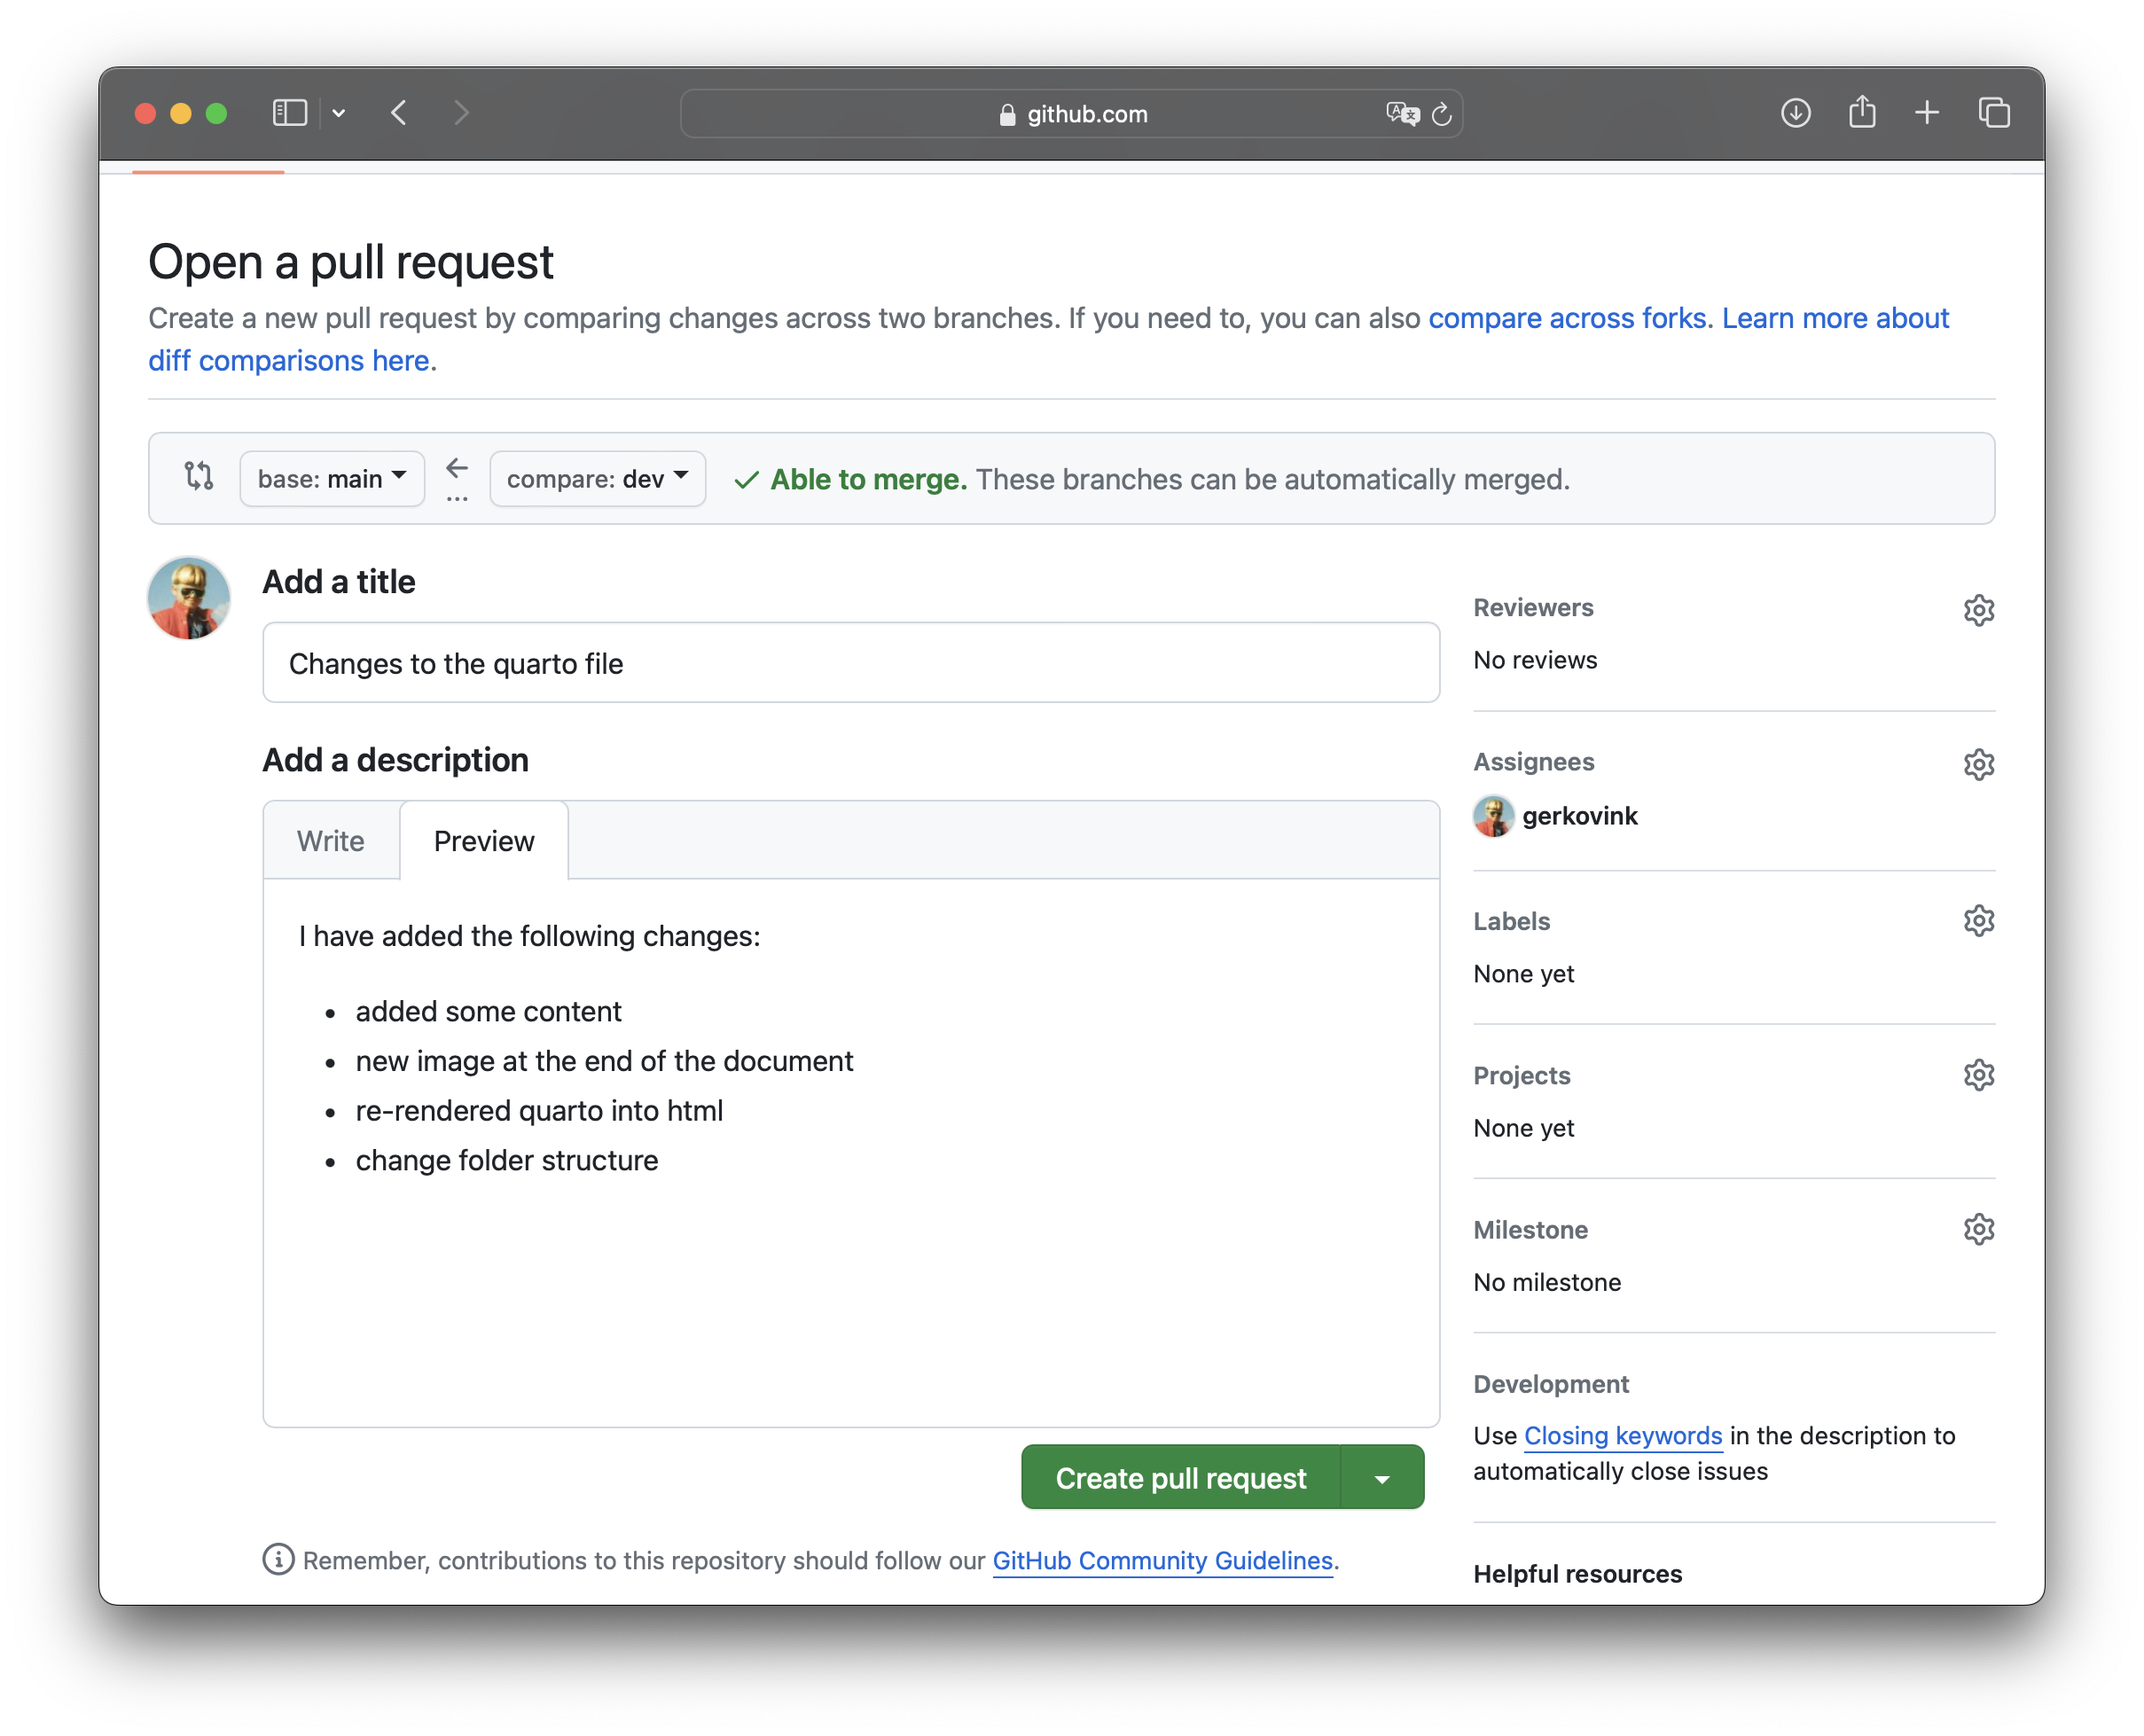
 2. Review the changes that you made and click Create pull request.
- choose
mainas the base (destination) repository branch and the branch that your changes are on as the compare branch - add an informative title and description
- detail the changes that you made
- assign someone to review the pull request (if relevant)
In general, try to make the life of the maintainer as easy as possible by properly documenting your contributions.
Now the owner of the repository (Team A) will review the pull request. This is best done in the Files changed tab and by studying the Commits tab.
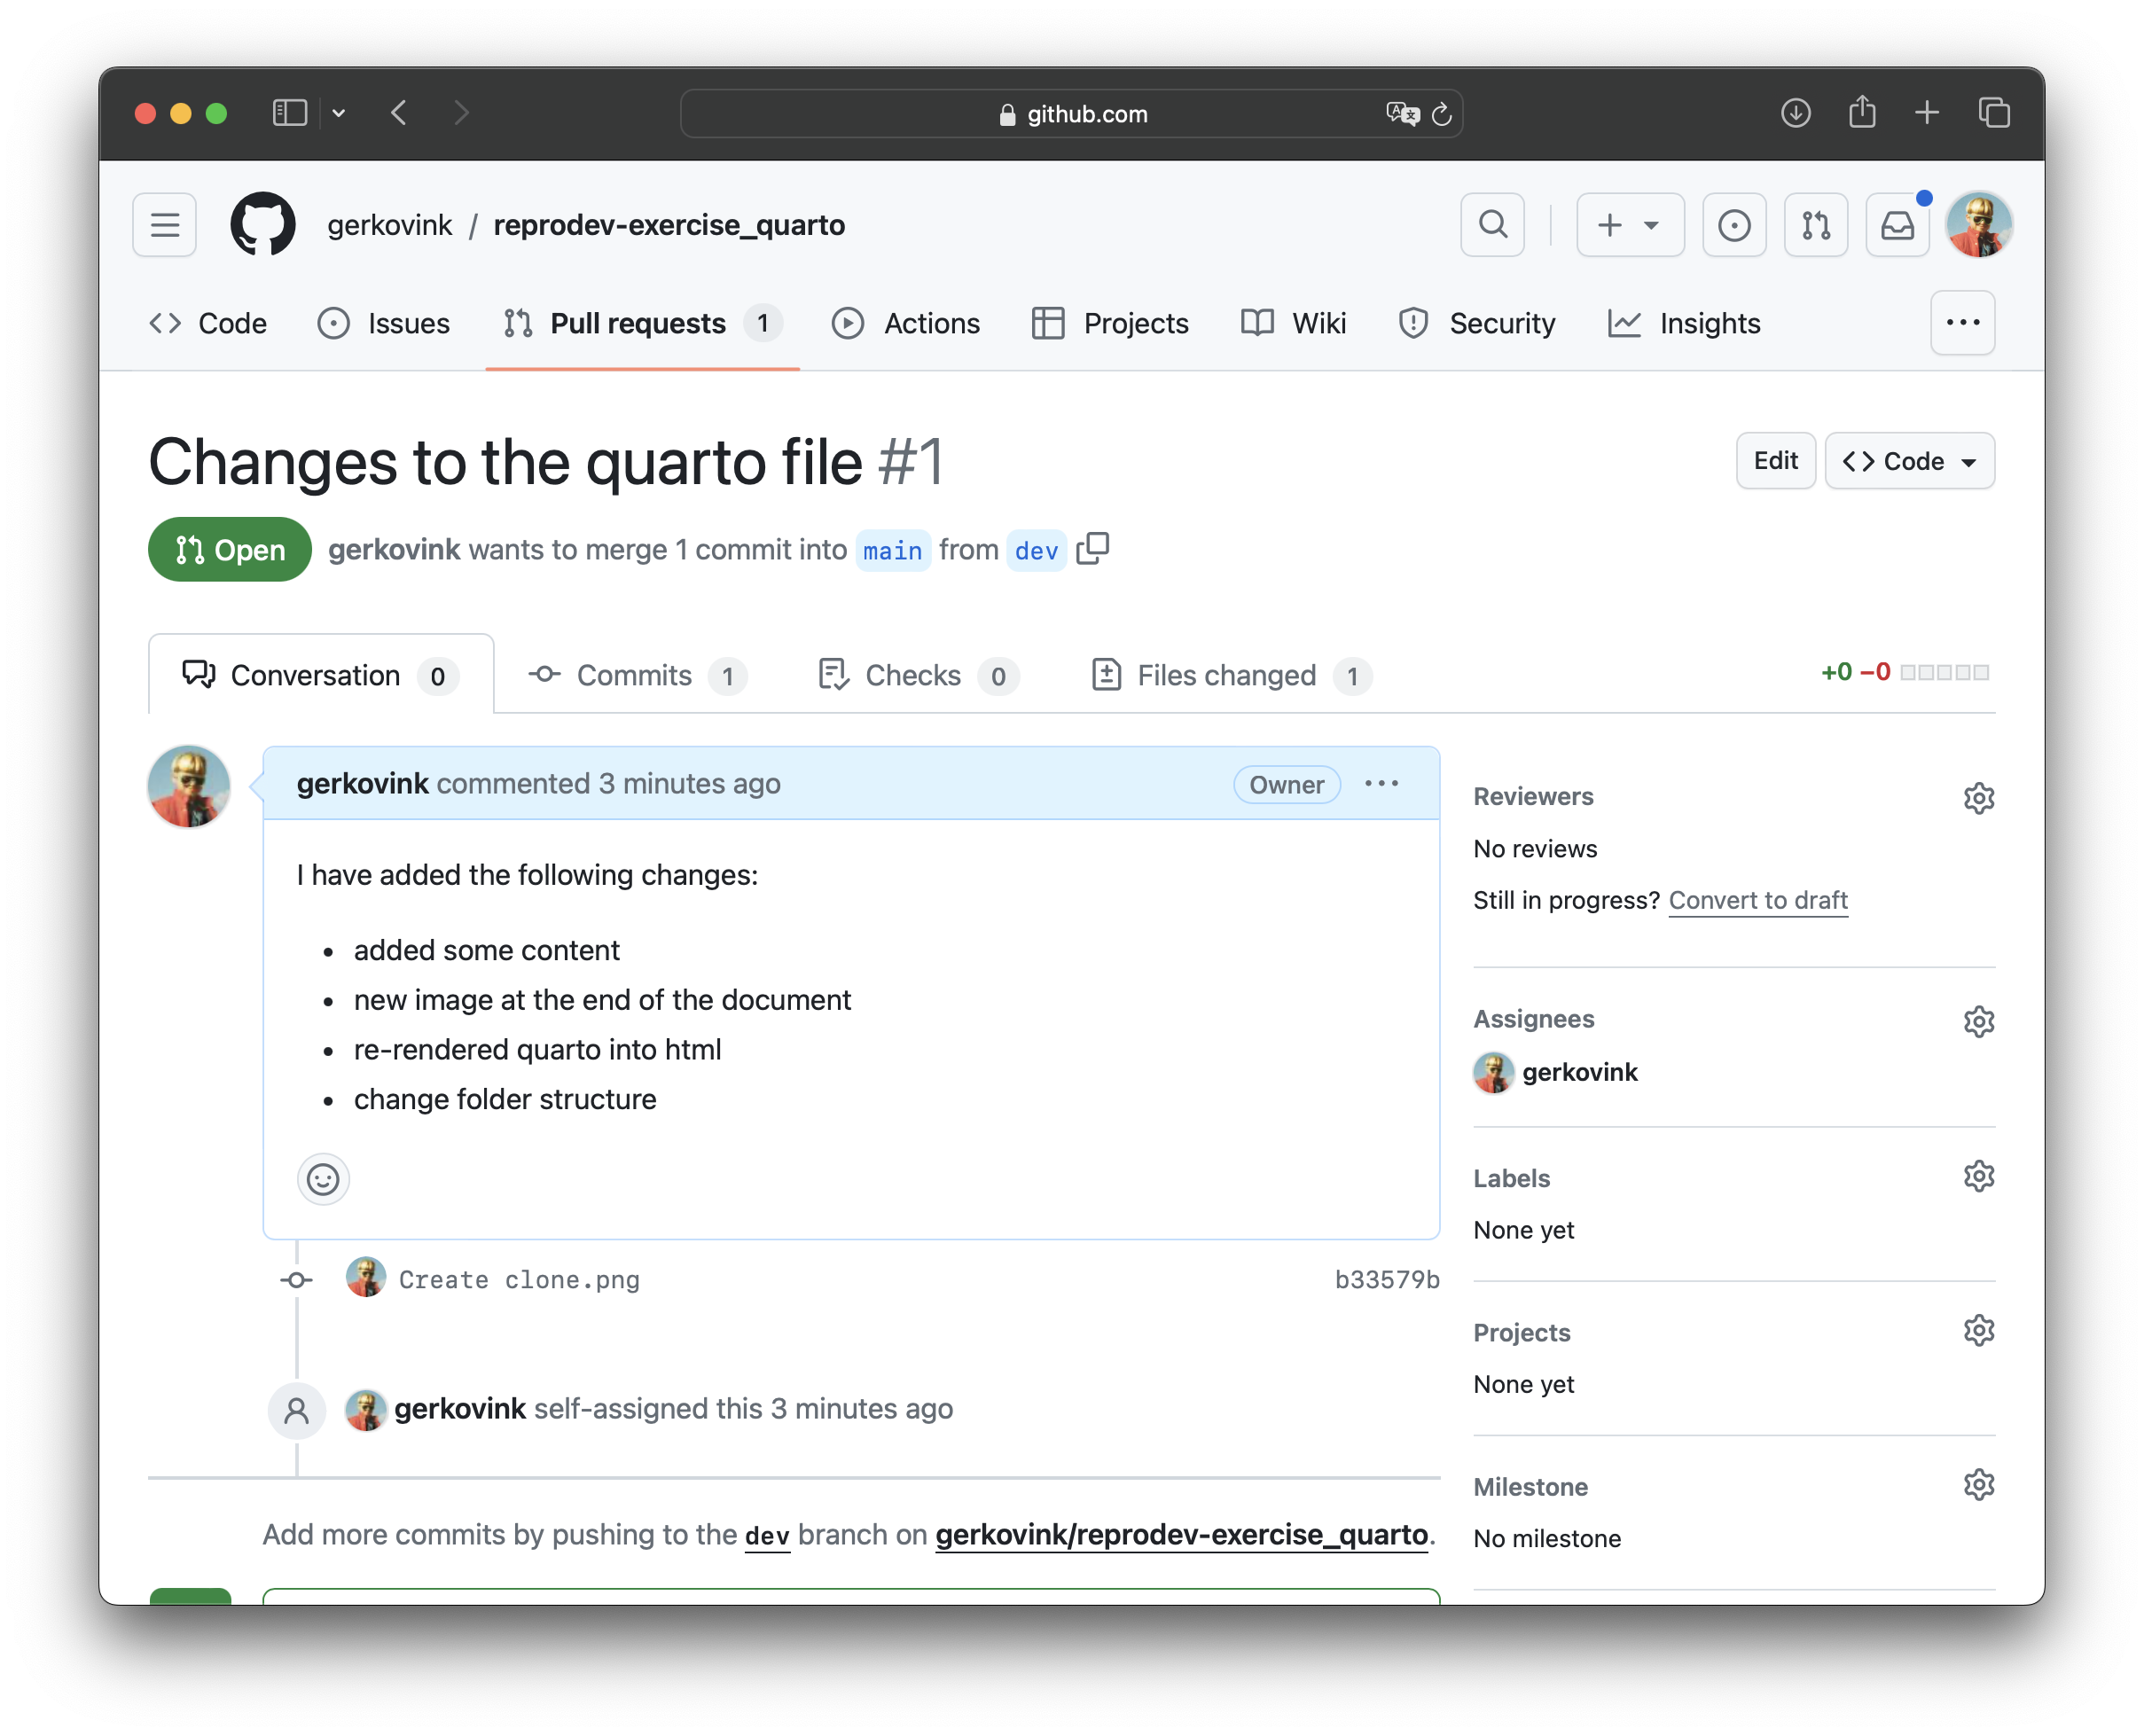
Go through the files and look at the code. Alternatively, you can check out the PR branch in GitHub Desktop and see the changes in the files on your machine and the commits in the Changes tab.
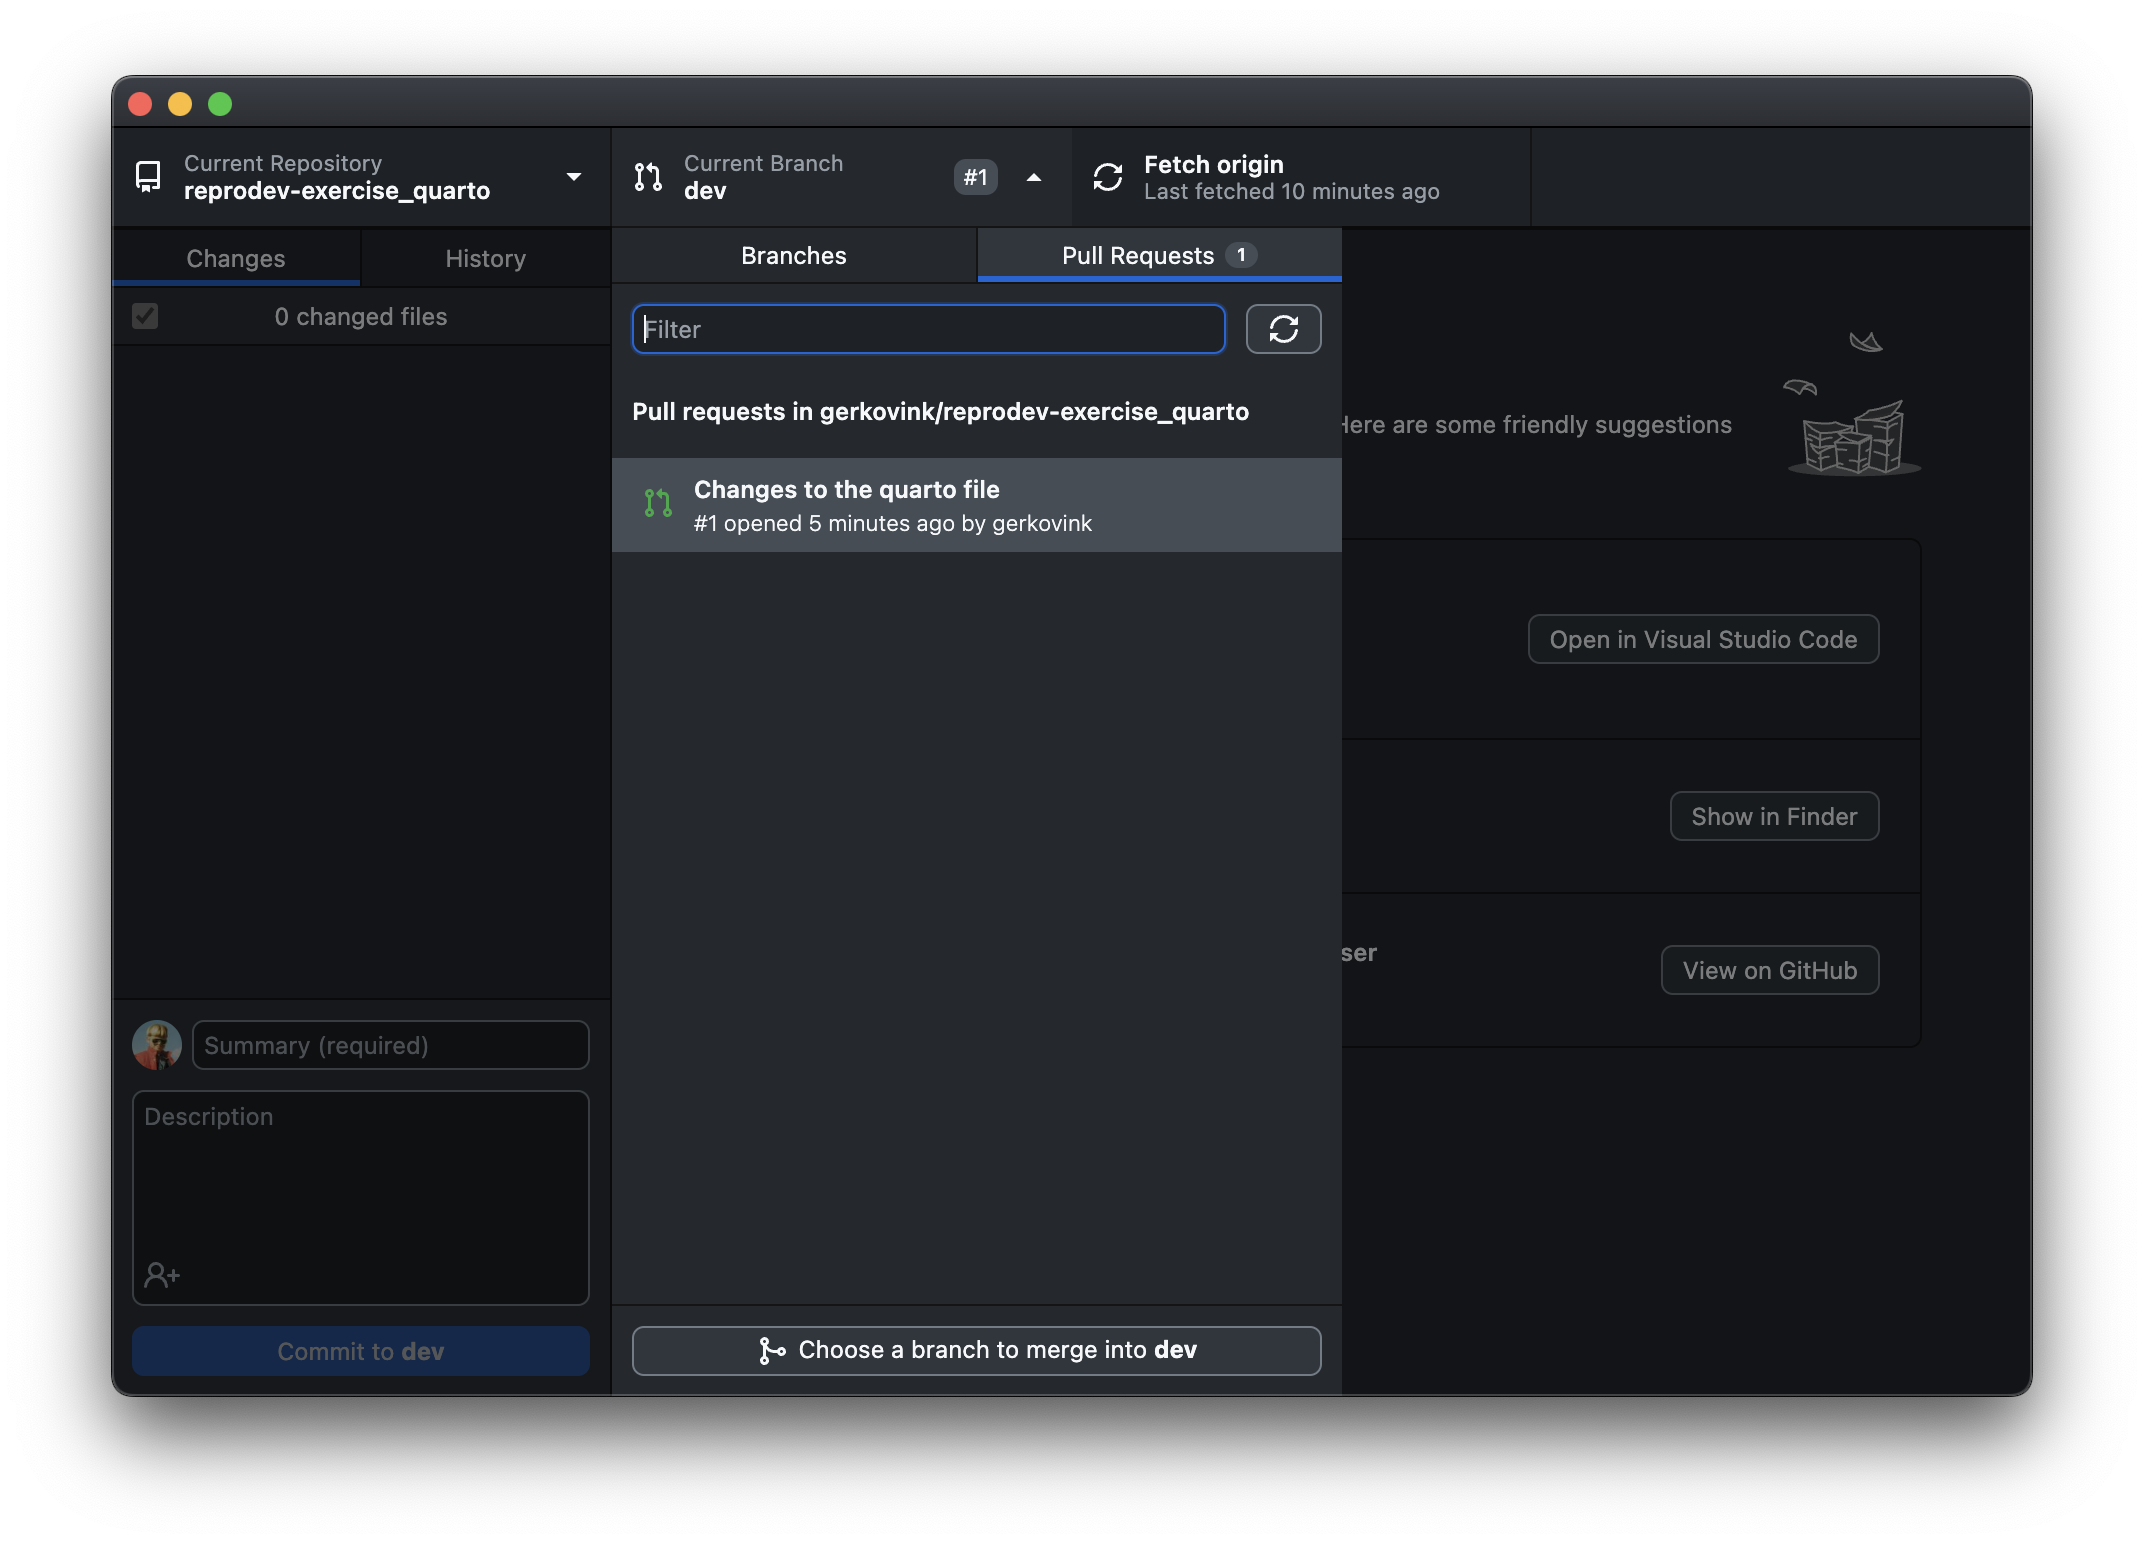 If you are happy, you can approve the changes and continue with merging the pull request. Approving is done with the Review changes button under the Files changed tab. It is nice to write a message to the contributor to thank them for their contribution.
Click on Merge pull request and then Confirm merge to merge the pool request. The changes are now merged into the main branch of the repository.
The development cycle is now complete and the contributed changes are part of the main repository.
Finally, we will make the portfolio visible by creating a website rendering and publishing our Quarto document to GitHub Pages.
Go to the settings of the repository and scroll down to the Pages section.
Choose the
mainbranch as the source for the website and click Save.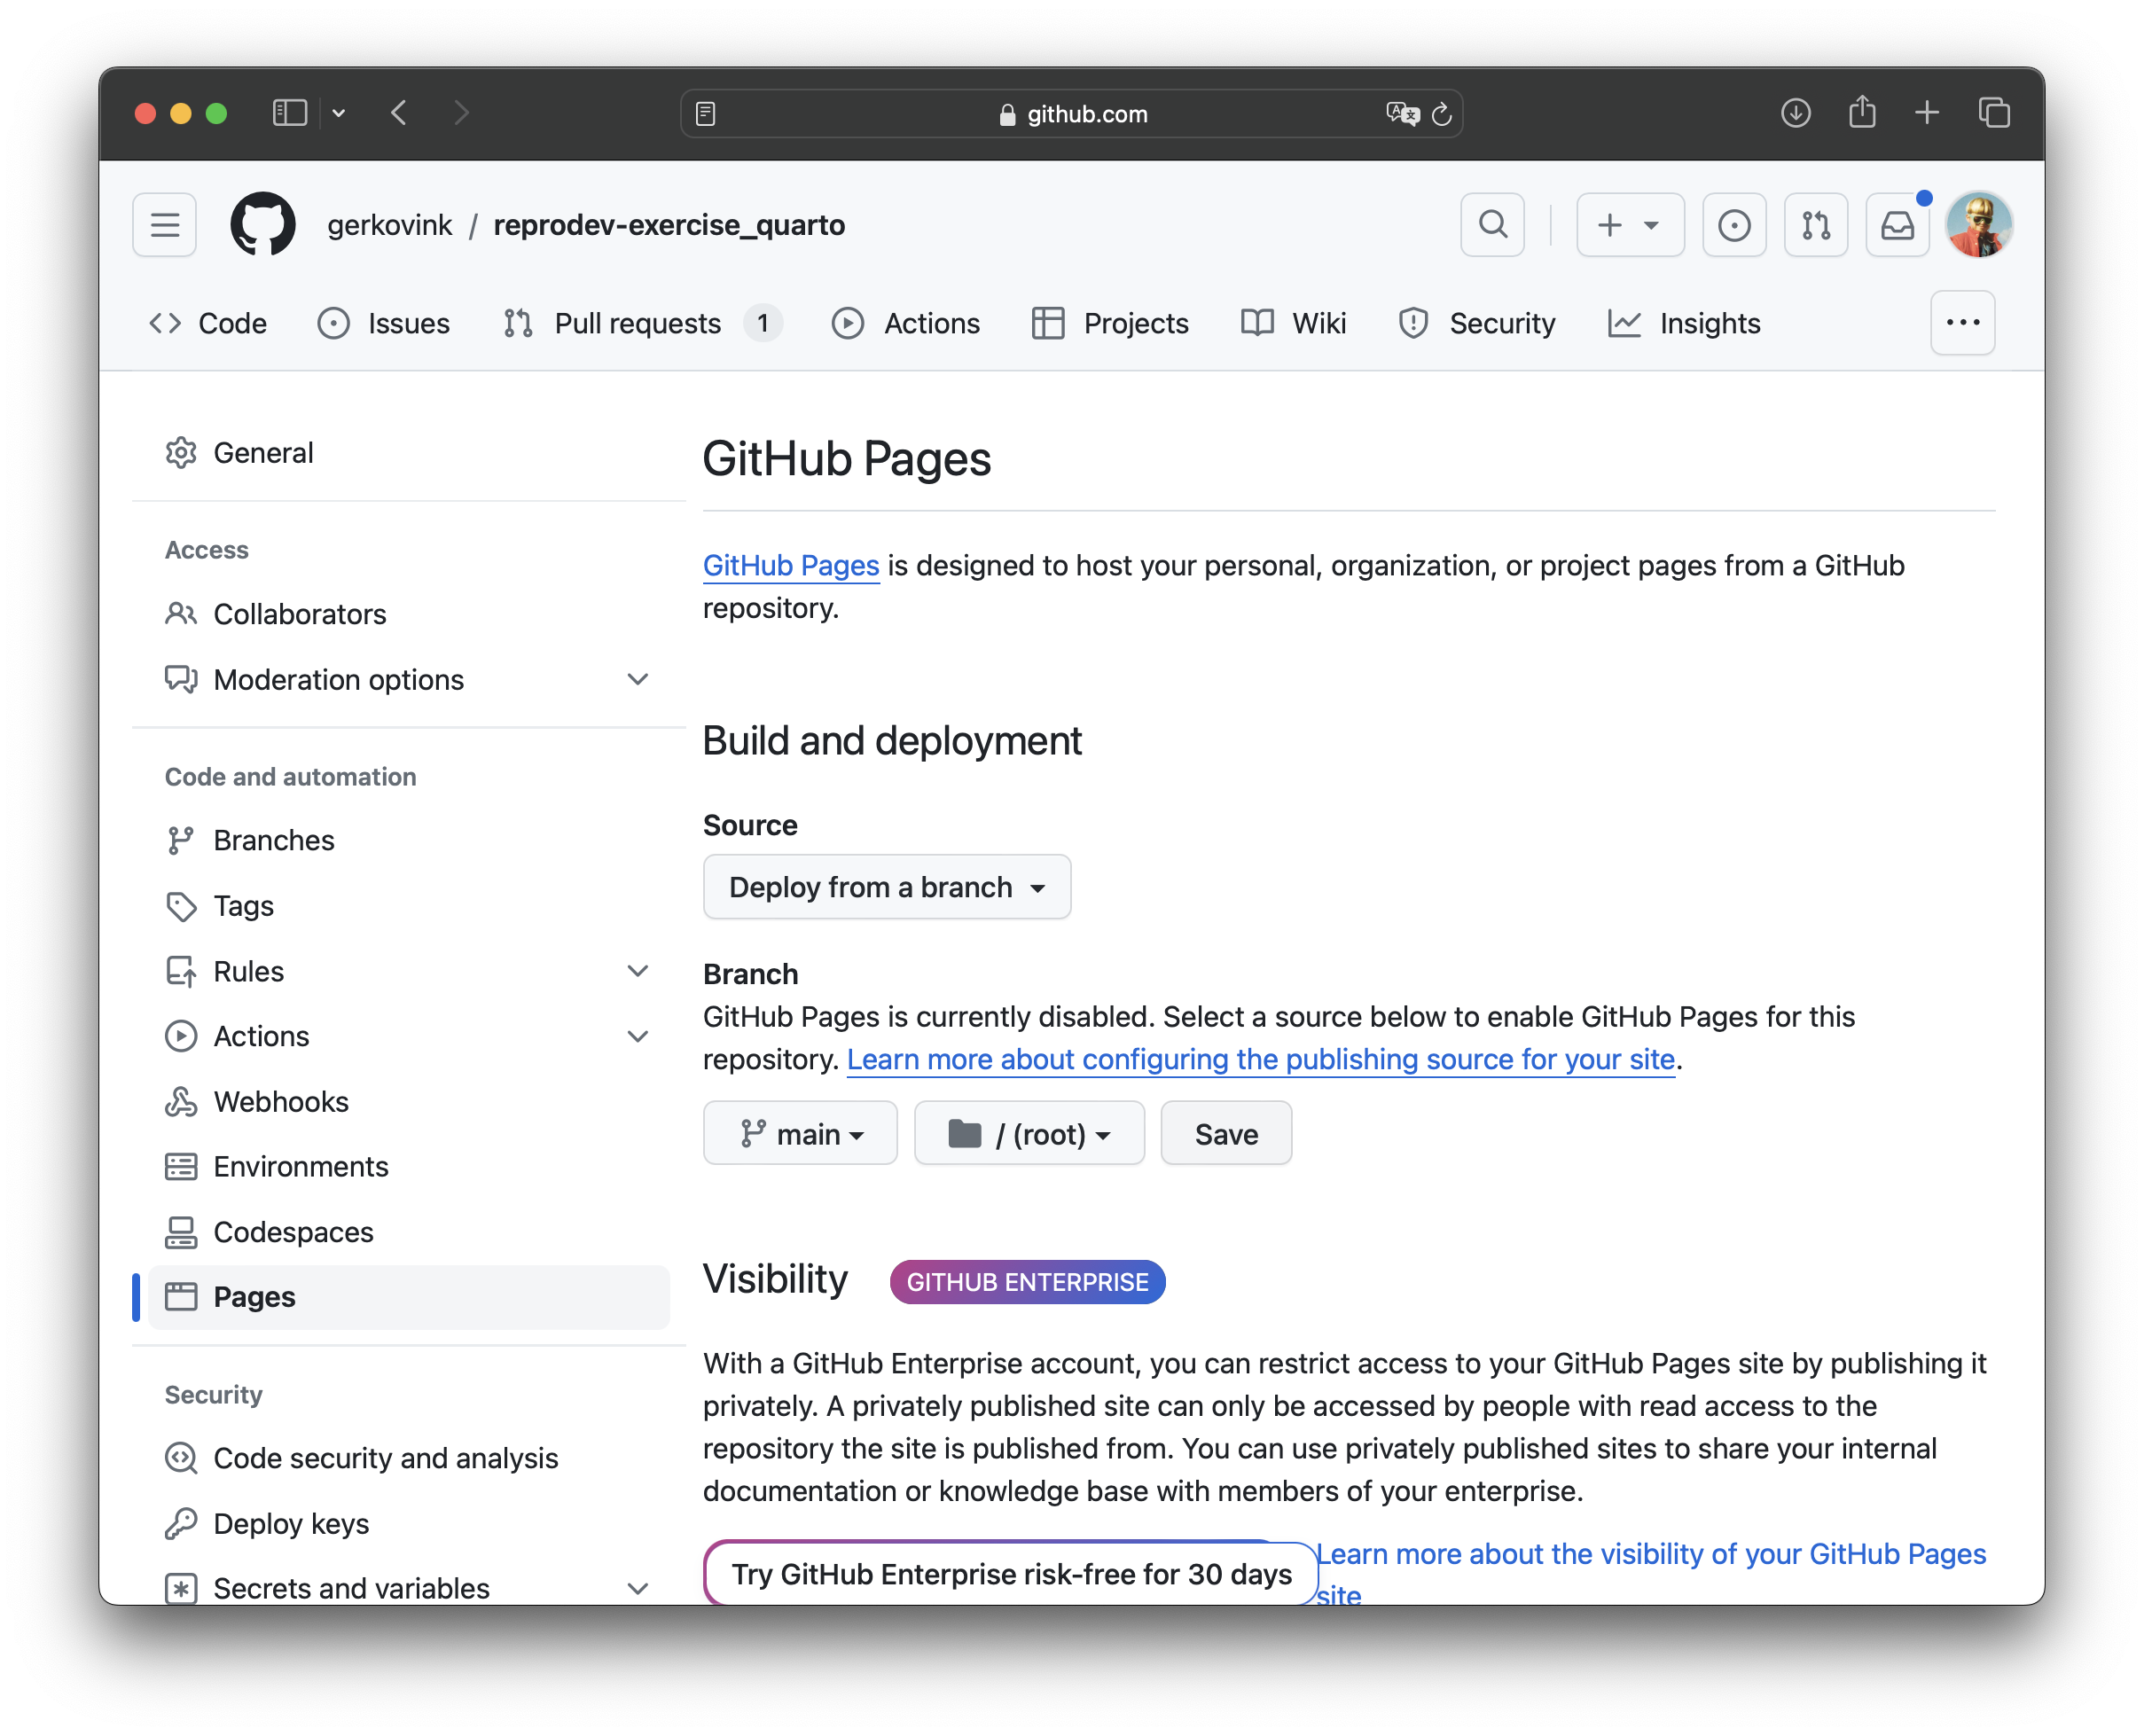
Scroll down and choose Enforce HTTPS if available. This allows you to piggyback on the
GitHubglobal certificate and have a securely accessible website.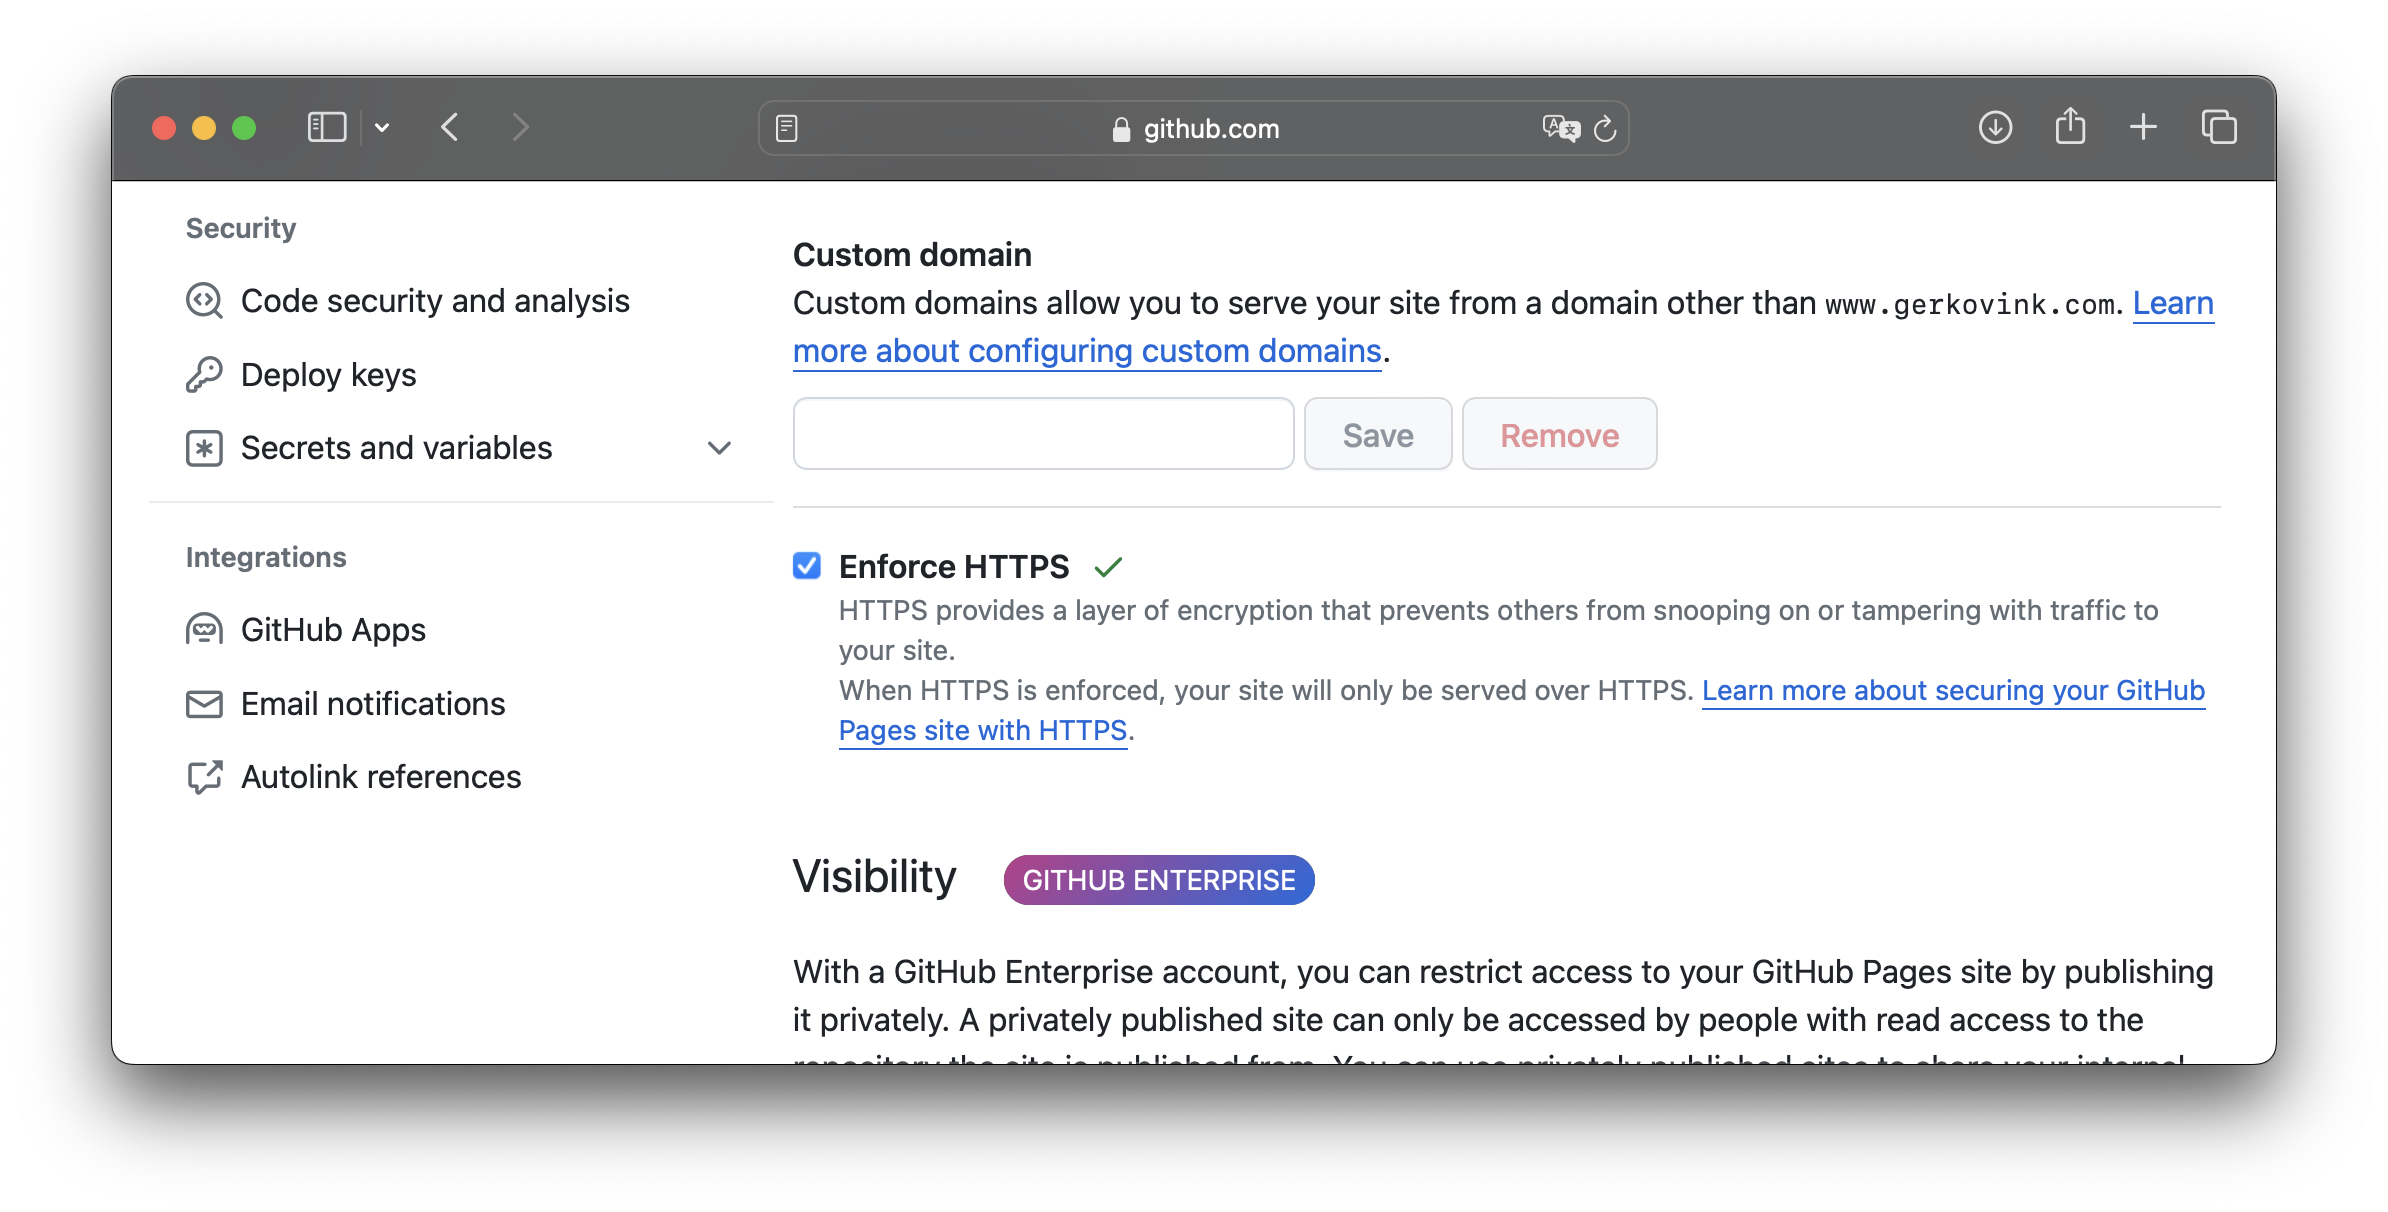
Wait for the website to be published. This can take a few minutes. You can check the status of the website by going to the Actions tab of the repository. You can find your website address in the Pages section of the repository settings.
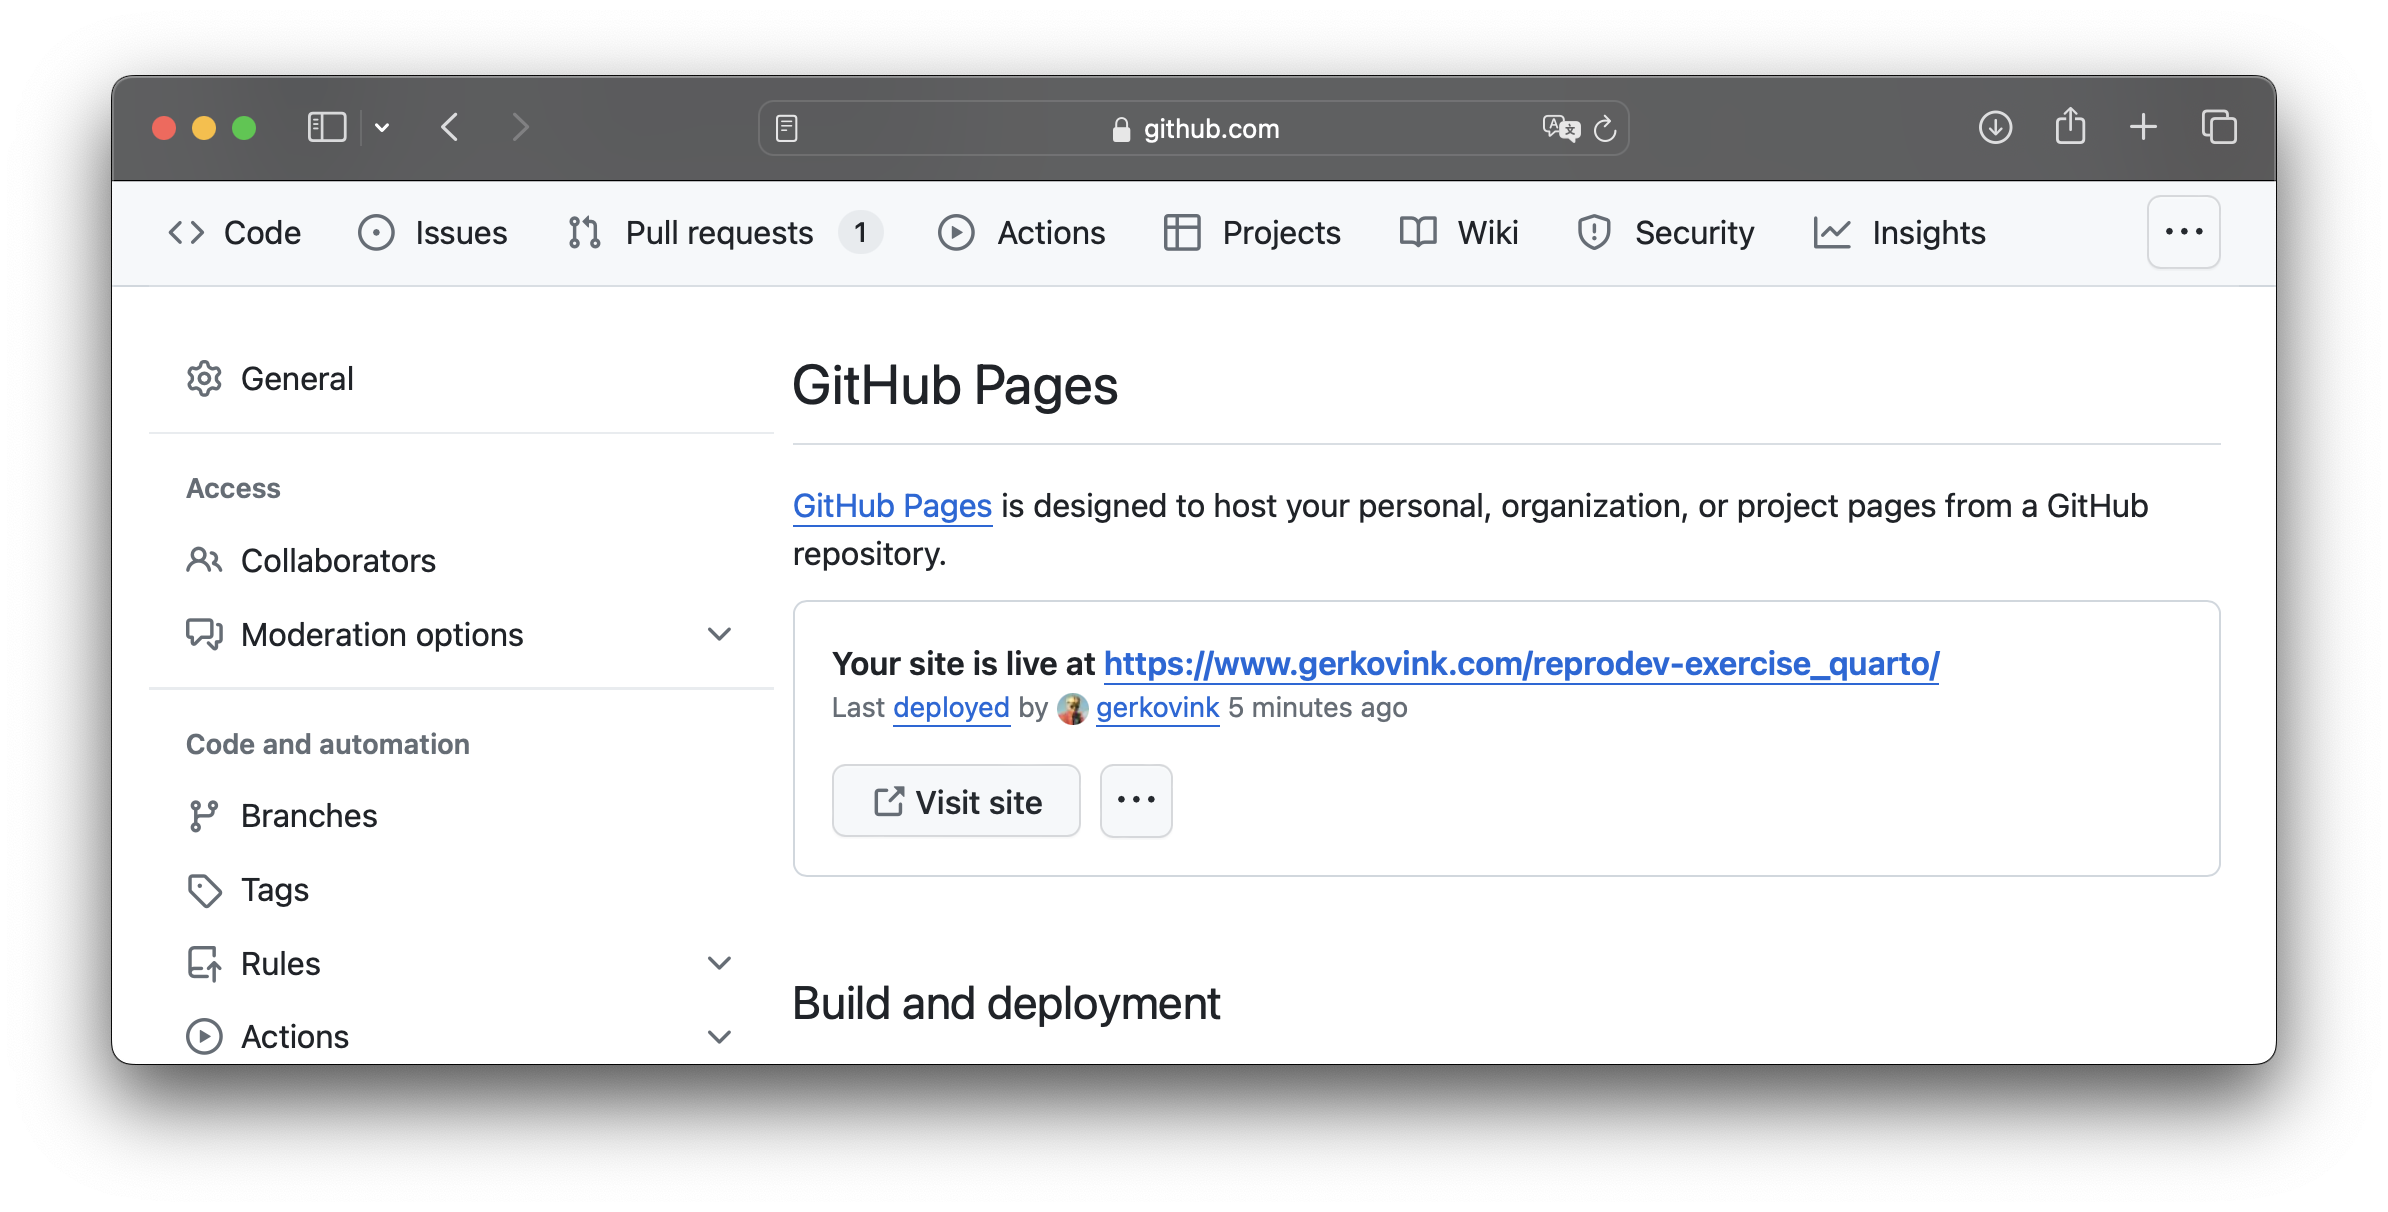
Update the README file with a link to the rendered
Quartodocument. If you did not change any parameters, this would be realized by adding the following line to theREADME.mdfile:
The rendered `Quarto` file can be found [here](/doc/reprodev-exercise_quarto.html)Going to your repository webpage on GitHub (often something like https://YOURUSERNAME.github.io/REPOSITORYNAME) should now serve you the README.md as a landing page, with a working link to your rendered Quarto file.
To continue
If you have time left, you can experiment with making your compendium into a target-powered data analylis pipeline. See this link for more details.